


Discontinued
This product is discontinued! There are no units left and there will be no pre-order for this product!
リンクが次に転送:
機能
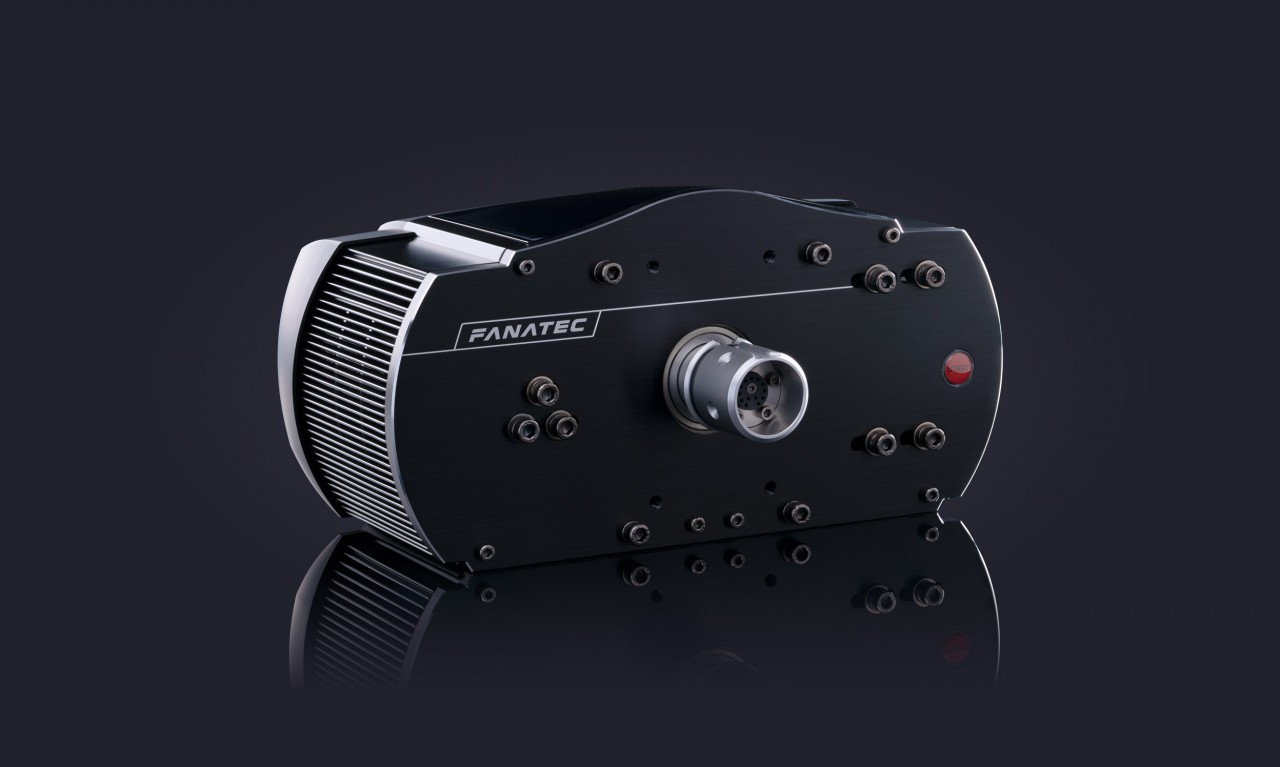
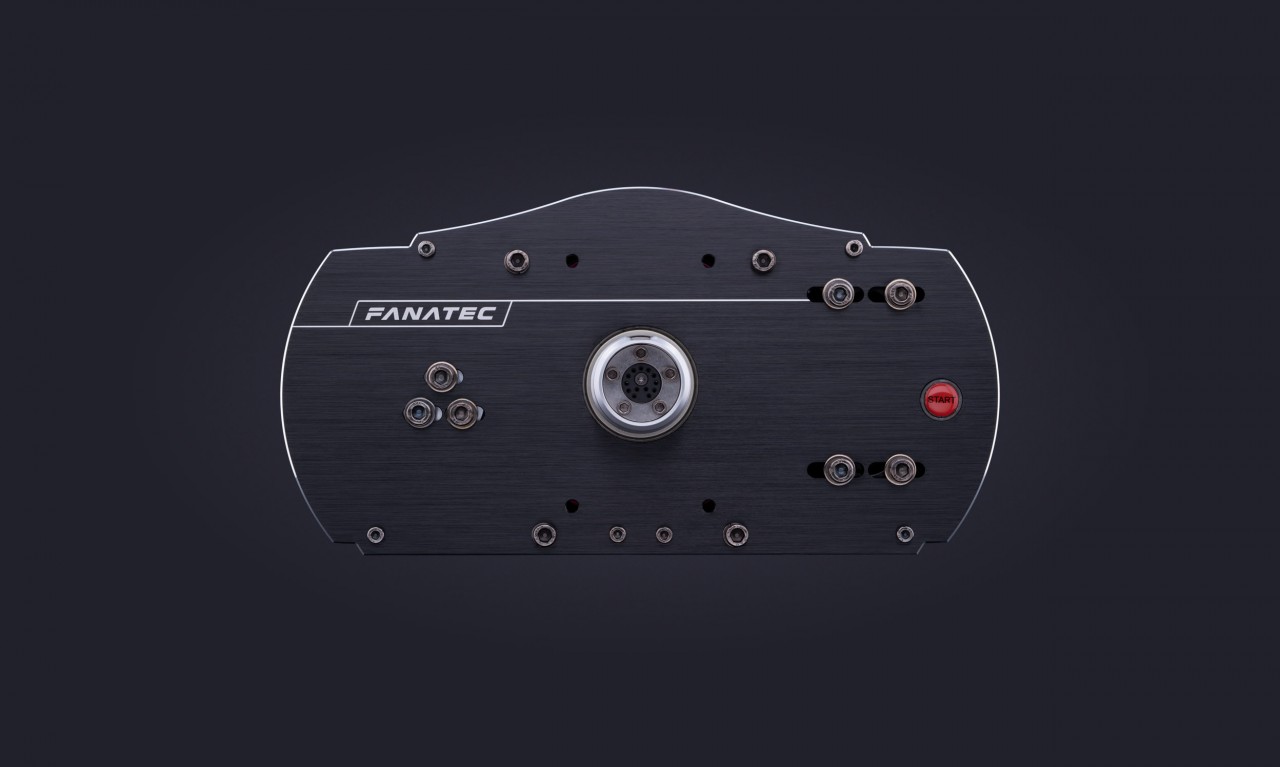
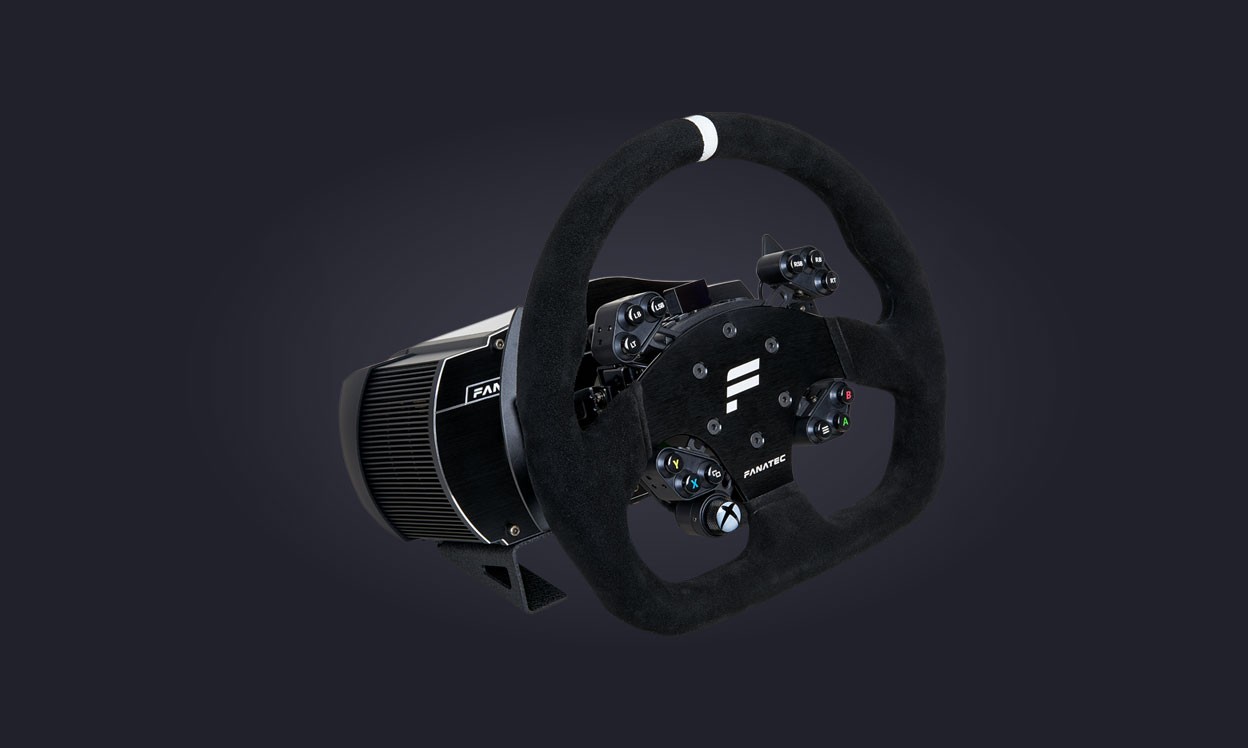
ClubSport Wheel Base V2.5:
- さらに広がるリアルな様々なスタイルのステアリングホイールコントローラー取付可能#
- ゲーム中に数秒でステアリングを交換できるQuick release システム
- Wheel baseはCNC 旋盤切り出しによる anodized加工のアルミパーツ
- 強固: 製品重量 4200 g, 製品サイズ (l x w x h) 210 mm x 295 mm x 150 mm
- DirectSensor™ テクノロジー:センサーはステアリング軸にダイレクトにマウントされておりモーターにセンサーがマウントされているベルト・アンド・ギア方式では避けられない干渉やパフォーマンス低下を防ぎます。
- DUAL HALLテクノロジー: 一つのセンサーはモーターに、二つ目のモーターはステアリング軸に 取り付けられています。最も精密なセンサー検出を実現しています。
- ステアリング上のUltra 強力なブラシレスサーボモーター
- 二つのバイブレーションモーター(取り付けモデルによります。)
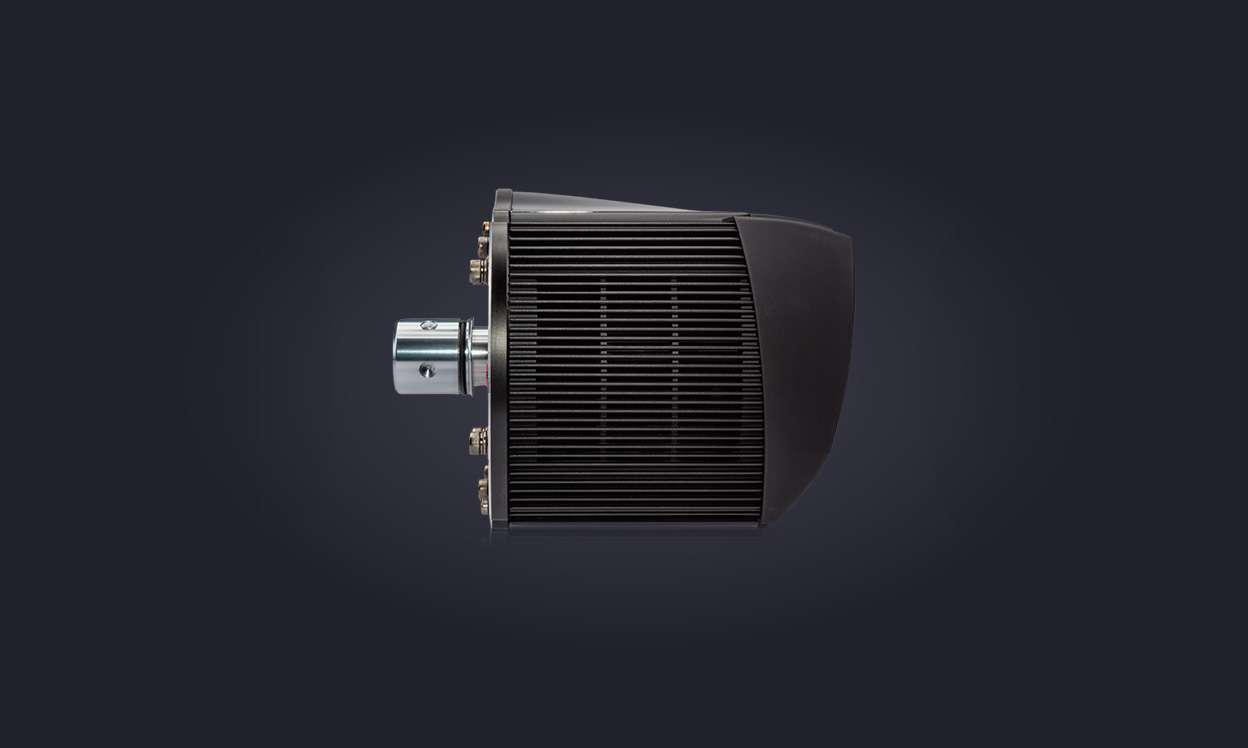
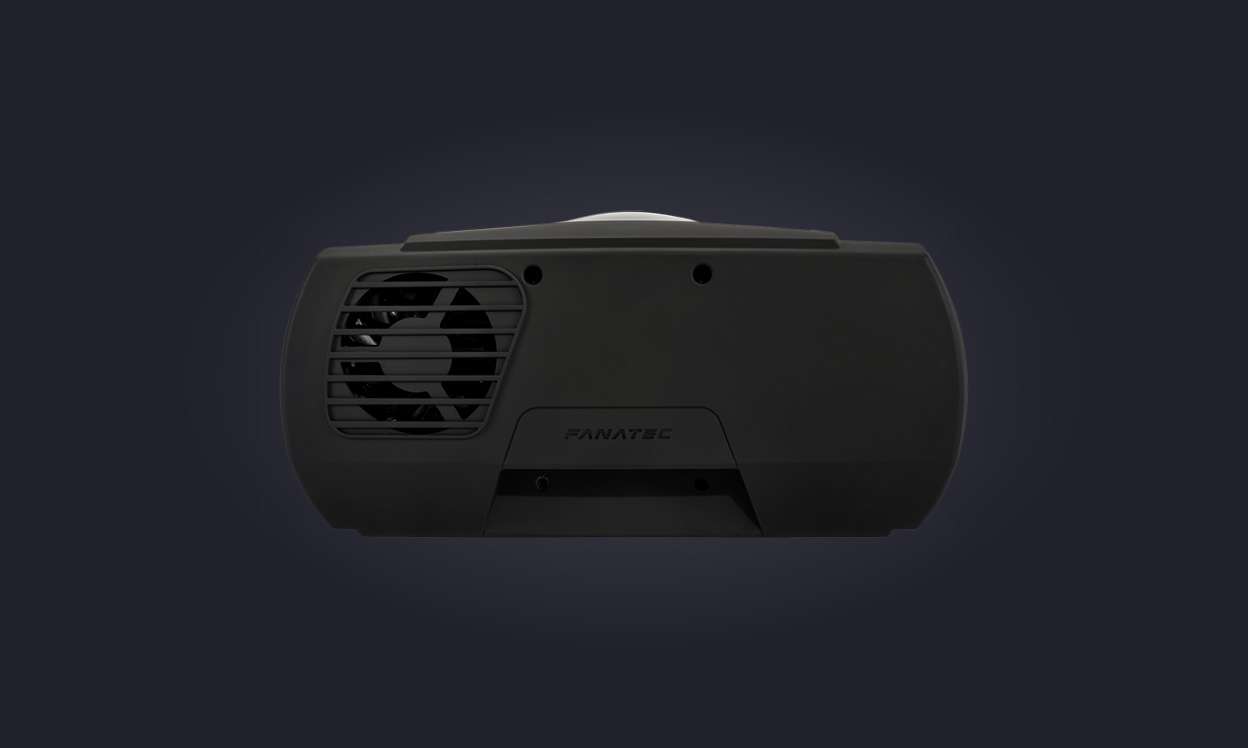
- 冷却システムは大きな二つのファンをもつ(左と後部) と巨大なモーターのヒートシンクを採用
- 改良されたベルトドライブ機構:完全メタル製、高品質ボールベアリング、ヨーロピアンベルトを用いて考える限りもっともスムーズで正確なフォースフィードバックを実現します。
- 高いベルトテンションによりスリップを防ぎ、耐久性の高いボールベアリングは引きずり抵抗を最小にします。
- パドルや その他のオープションアクセサリーをマウントできます。
- Firmware のアップデートが可能です。アップデートにより機能追加等が可能となります。
- Motor driver firmware はアップデート可能。
- 取り付けたClubSport Steering Wheel のチューニングメニューで900°回転を選択可能、設定変更により回転角度を設定できます。
- 素早い 1000 Hz USB 更新レート。
- 二つの外部シフターと同時に接続可能(例 H-pattern と sequential)。
- ゲームと独立したLEDディスプレーによるチューニング機能。ゲーム中も使用可能。
- 5 wheel セットアップまでをセーブ可能。
- ゲーム設定と独立したセンシティビティー調整機能 回転核を 90° から 900°で調整可能。
- ゲーム中にフォースフィードバックの強さを調整。
- steering wheel 上での振動密度の調整可能(steering wheel モデルによります).。バイブレーションモーターはゲームから直接制御または、ABSファンクションを使うことができます。
- ABS vibration を steering wheel でシミュレート(steering wheel modelによります) 加えて ClubSport Pedals V3 のようなランブルモーター搭載モデルではペダルでもABS vibration をシミュレート。inputの設定でstarting point at % of brake inputの設定で可能となります。
- アドバンスドドリフトモードでは natural damper を使用して意図せぬ揺れやwheel速度を上げる negative damper効果を避けることができます。
- ばねやフォースイフェクト、ダンパーの強さを変更してフォースフィードバックをカスタマイズ可能。
- ClubSport Pedals V3 や CSL Elite Pedals LC のようなロードセル対応ペダルとの組み合わせにおいてはブレーキ踏力sensitivityの調整可能。
- *チューニング機能は変更になる可能性があります。
互換性
周辺機器
- 全ての Fanatec ClubSport Steering Wheels
- 全ての Fanatec CSLSteering Wheels
- 全ての Fanatec ペダル
- 全てのFanatec シフターセット
- 全てのFanatec Cockpits と Wheel Stands. ドリルパターンは Porsche 911 or CSR wheelと同じです。
プラットフォーム
- PC: 商品はPCとの互換性があります。ご使用においてはPC対応のsteering wheelsと組み合わせて使用ください。
- Xbox One®: 互換性は(オプションの) ClubSport Steering Wheel Universal Hub for Xbox Oneや CSL Steering Wheel P1 for Xbox Oneといった接続可能なXbox One互換ステアリングコントローラーを接続することで確保されます。 Xbox license 品でないステアリングコントローラーをとりつけても Xbox One互換となはりません。
- PlayStation®: 本製品は PlayStation® シリーズとは互換性がありません。アップグレード方法も提供されておりません。
特記事項
- これは基本ユニットのみです。運転するには、いくつかの他のアイテムが必要です。製品コンフィギュレーターを使用してシステムを構成してください。
- ハンドルは含まれていません。この製品を操作するには、ClubSport / CSLステアリングホイールが必要です。
- ペダルは含まれていません。
- テーブルクランプは含まれていません。ネジでコックピットに取り付けるか、オプションのClubSportテーブルクランプを購入する必要があります。
- ハードマウントネジは3穴パターンにのみ付属し、20°の角度アダプターが事前に取り付けられています使用可能なネジに関する情報については、マニュアルをお読みください。
重量
- 寸法(長さx幅x高さ) 46cm x 28cm x 29cm
- 含まれるもの 8.3kg
- 技術仕様 6.94kg
同梱物
- ClubSport Wheel Base V2.5
- クイックガイド
- 電源(〜3 + 1.5 m / 9.8 + 4.9フィート)
- USBケーブル(〜2 m / 6フィート)
- 2x RJ12(オス)-PS / 2(メス)アダプタケーブル(〜50)
プラットフォーム
- プラットホーム PC, XBox One対応
- 接続ポート シフター1, シフター2, データ, ペダル
- ステアリングホイールを使用したチューニングメニュー はい
- テーブルクランプ オプショナル
- ホイールベースの回転灯 いいえ
- クイックリリース はい
- 位置センサー Dual Magnetic Hall Sensors
- モードボタン いいえ
- ハードマウント 3穴パターン, 角度アダプター付き4穴パターン
- フォースフィードバックドライブシステム 2つのマルチVリブドベルト
- フォースフィードバックドライブ材料 ボールベアリングを備えたCNC機械加工アルミニウムプーリー
- 冷却システム ダブルファン
- 調整可能なスプリング はい
- 調整可能なショック はい
- 調整可能な感度 はい
- 調整可能なFF強度 はい
- 調整可能なドリフトモード はい
- 調整可能なブレーキ力 はい
- 調整可能なABS振動 はい
- 回転度 90°-900°
- トルク 8Nmまで
- USB更新レート 1000Hz
- ドリルテンプレート
- CSW V2.5 Drilling Template with Adapter A3
- CSW V2.5 Drilling Template with Adapter A4
- CSW V2.5 Drilling Template without Adapter A3
- CSW V2.5 Drilling Template without Adapter A4
- マニュアル
- Manual ClubSport Wheel Base V2.5
- QuickGuide ClubSport Wheel Base V2.5
- Driver & Firmware Instruction Manual - EN
FanaLabソフトウェアはこちらです: https://forum.fanatec.com/categories/fanalab
最新のファームウェアバージョン
PCまたはXboxOneのどちらで使用する場合でも、デバイスを使用する前に、必ず最新のPCドライバーを使用してホイールベースファームウェアを更新してください。
この製品の最新のファームウェアは最新のドライバーに含まれており、個別にダウンロードすることはできません。 新しいドライバをインストールする前に、すべてのFanatecデバイスをPCに接続し、電源を入れてください。
ドライバー
Fanatec Driverをインストールした後、Fanatec WheelPropertiesページを開いてファームウェアアップデートを実行します。接続されているデバイスに応じて、ファームウェアを更新するたびに[プロパティ]ページを再度開き、更新プロンプトが表示されるかどうかを確認します。たとえば、ホイールベース、モーター、ステアリングホイールのファームウェアを個別に更新する必要がある場合があります。
ドライバv273および付属のファームウェアはまだCSWV2と互換性がありません!これまでのところ、新しいCSWV2.5でうまく機能するように最適化されているだけです。 CSW V2のダウンロードページに移動して、この製品の最新のドライバーとファームウェアのバージョンを入手してください。
ドリルテンプレート – 追加情報
自宅でドリルテンプレートを印刷する場合は、印刷サイズが100%(ファイルサイズ=印刷サイズ)であることを確認してください。したがって、たとえば印刷ダイアログで「自動ページスケーリング」を無効にします。
At the moment, the products we have available in our webshop are only compatible with Windows PC ( WIN 7, 8, 10 and 11), PS4, PS5, Xbox One and Xbox Series X. Mac OS or other systems are currently not supported.
Note: Console compatibility is limited for each product! Please check the compatibility section of the product page for each device for more information.
Derzeit sind alle Produkte, die im Webshop verfügbar sind, nur mit Windows PC (Win 7, 8, 10 und 11), PlayStation 4, 5 und Xbox One, Xbox Series X kompatibel. Andere System werden nicht unterstützt.
Die Funktionen der einzelnen Produkte können auf den Konsolen eingeschränkt sein. Daher empfehlen wir die Produktbeschreibungen der einzelnen Produkte genau zu überprüfen.
MacでFanatecギアを使用できますか?
現時点では、ウェブショップで入手できる製品は、Windows PC、PS4、PS5、Xbox One、Xbox SeriesXとのみ互換性があります。Mac OSは現在対応されていません。
注:コンソールの互換性は、製品ごとに制限されています。詳細については、各デバイスの製品ページの互換性セクションを確認してください。
We are often asked if you can use Thrustmaster or Logitech wheels, pedals, shifters or other accessories in combination with Fanatec hardware. In general the devices of different vendors are not compatible to each other. Therefore, you cannot directly connect products from different companies to each other or at least this is not supported.
In the past there have been adapters which might have worked to make such combinations possible but those solutions have not been reliable due to different techniques used in the hardware and different signal tolerances even if similar specs have been used. Fanatec cannot make any statements about third party adapters or similar solutions. We are putting a lot of effort into the goal of having the highest possible intercompatibility in between all our devices, which is not that easy to achieve. For any questions about compatibility we can only direct you to the information given on our product pages or within our FAQs.
The statement above is valid for every platform (especially on consoles!) EXCEPT PC...since you can connect multiple, individual USB devices there IF the game/simulation supports that.
This gives you multiple options to combine hardware of different vendors the way you want. Most simulation games on Windows PCs will allow you to use combinations like: Logitech wheel, Thrustmaster shifter and Fanatec pedals for example. Since Fanatec provides USB solutions for more or less every kind of hardware (shifter/handbrake by USB adapter, USB pedals, USB wheels, etc.) the possibilities to build your perfect setup are endless.
Even if it is very common, please be so kind to make some research on the web or ask the simulation developer if multiple USB devices are supported.
Wir werden oft gefragt, ob man Thrustmaster- oder Logitech-Racing Wheels, -Pedale, -Schalthebel oder anderes Zubehör in Kombination mit FANATEC-Hardware verwenden kann.
In der Regel sind die Geräte der verschiedenen Hersteller nicht miteinander kompatibel. Daher können Sie Produkte verschiedener Firmen nicht direkt miteinander verbinden oder zumindest wird dies nicht unterstützt.
In der Vergangenheit gab es zwar einen Adapter, der solche Kombinationen ermöglicht hat, aber diese Lösung ist aufgrund unterschiedlicher Techniken in der Hardware und unterschiedlicher Signaltoleranzen nicht mehr möglich, selbst wenn ähnliche Spezifikationen verwendet wurden.
FANATEC kann keine Aussagen oder Empfehlungen zu Adaptern von Drittanbietern oder ähnlichen Lösungen geben. Bei Fragen zur Kompatibilität können wir Sie nur auf die Informationen auf unseren Produktseiten oder in unseren FAQs verweisen.
Die obige Aussage gilt für jede Plattform, (vor allem auf Konsolen!) außer PC, da Sie dort mehrere einzelne USB-Geräte anschließen können, wenn das Spiel bzw. die Simulation dies auch unterstützt. Auch wenn es durchaus üblich ist, recherchieren Sie bitte im Internet oder fragen Sie den Simulationsentwickler, ob mehrere USB-Geräte unterstützt werden.
Dadurch haben Sie mehrere Möglichkeiten, Hardware verschiedener Hersteller so zu kombinieren, wie Sie es wünschen. Bei den meisten Simulationsspielen auf Windows-PCs können Sie Kombinationen verwenden wie:
Zum Beispiel Logitech Lenkrad, Thrustmaster Shifter und FANATEC Pedale. Da FANATEC USB-Lösungen für mehr oder weniger jede Art von Hardware anbietet (Schalthebel/Handbremse per USB-Adapter, USB-Pedale usw.), sind die Möglichkeiten, Ihr perfektes Setup aufzubauen, nahezu endlos.
There is a 32 bit and a 64 bit version of a Fanatec driver available. It depends on the "system type" of your PC which of those versions you need to choose. If the system type of your PC has a 32 bit operation system, you need the 32 bit version of the driver. If the system type of your PC has the 64 bit operation system, you will need the 64 bit version.
For finding this information go to the "Control Panel" of your PC -> "System and Security" -> System:

Es gibt eine 32 bit und eine 64 bit Version des Fanatec Treibers. Welche Treiber Version ausgewählt werden muss, hängt von dem jeweiligen "System Typ" des PC´s ab. Wenn Ihr PC ein 32 bit Betriessystem hat, benötigen Sie die 32 bit Version, wenn es ein 64 bit Betriebssystem ist, benötigen Sie die 64 bit Version.
Sie finden diese Information unter "Systemsteuerung" -> "System und Sicherheit" -> "System":

Any RJ12-RJ12 (6p6c straight) and USB (type A -- type B; USB 1/2.0; USB Type C) cable which has the right connectors on both ends can be used. If you use high quality cables of similar length to the originals, there should be no issues. Please keep in mind that FANATEC cannot guarantee perfect functionality of our products if third-party products are used, even if the combination should work!
Important notes regarding (replacement) cables:
- Cables which are significantly longer than the original cables can cause connection issues
- Extension cables are often the source of connection issues. Longer high-quality cables are the better option
- If your product came with a high-quality ferrite core cable, a replacement cable should be of similar quality
- For USB Type C cables, please make sure that you are using USB Type C Data and not a Charging cable
Q: Can I purchase replacement "RJ12--RJ12" / "USB A -- USB B / USB Type C (for the CSL DD)" cables from FANATEC?
A: We should be able to offer replacement cables for all recent products. If they are not offered in the webshop, please ask our support team. Alternatively, it is also possible to use similar standard USB/RJ12 high quality cables, which are inexpensive and can be found at most electrical retailers.
Grundsätzlich sollten alle standard RJ12--RJ12 (6p6c - straight) und USB (Type A auf Type B; USB 1/2.0) Kabel passen und einwandfrei funktionieren, welche die richtigen Stecker bieten. Sofern hochqualitative Kabel mit ähnlicher Länge verwendet werden, sollte dies kein Problem darstellen. Bitte beachten Sie, dass Fanatec keine uneingeschränkte Garantie auf Funktionalität geben kann, sofern Teile/Produkte von Drittherstellern verwendet werden bzw. involviert sind.
Wichtige Anmerkungen zu Ersatzkabeln:
- Kabel welche (deutlich) länger als die Originalkabel sind, können zu Verbindungsproblemen führen
- Verlängerungskabel (und Adapterstecker) sind oft die Ursache von mangelhafter Übertragungsqualität der Signale. Längere Kabel wären hier die bessere Option.
- Wenn ihr Produkt mit einem hochwertigen Kabel inkl. Ferrit-Kern geliefert wurde, sollten sie als Ersatz ein ähnlich hochwertiges Kabel verwenden.
Frage: Kann ich ein (RJ12--RJ12 oder USB A -- USB B) Ersatzkabel von Fanatec kaufen?
Antwort: Wir sollten in der Lage sein für aktuelle Produkte Ersatzkabel zu Verfügung zu stellen. Falls diese im Webshop nicht gelistet sind, fragen sie bitte unser Supportteam danach. Es ist allerdings auch möglich ähnliche Standardkabel in hoher Qualität von anderen Händlern zu erschwinglichen Preisen zu kaufen und zu verwenden.
Before first use the H-gated shifter must be calibrated to work properly. The calibration has to be done only once and will be saved in the firmware but it will be deleted after a firmware update. Please do it again after the wheel is updated/flashed.
1. Connect the H-gated shifter to "shifter port 1" of your wheel
2. Power the wheel on
3. Wait until auto-calibration and boot sequence are finished
4. Press "Tuning Button" + "Start Button" simulanously (the position of these buttons may vary depending on the CSW rim you are using!)
Display will show G_n
5. Move the shifter into neutral position and press "Start Button"
Display will show G_r
6. Move the shifter into reverse gear position (push stick to the very left position and up) and press "Start Button"
Display will show G_1
7. Move the shifter into first gear position and press "Start Button"
Display will show G_2
8. Move the shifter into second gear position and press "Start Button"
Display will show G_3
9. Move the shifter into third gear position and press "Start Button"
Display will show G_4
10. Move the shifter into fourth gear position and press "Start Button"
Display will show G_5
11. Move the shifter into fith gear position and press "Start Button"
Display will show G_6
12. Move the shifter into sixth gear position and press "Start Button"
Display will show G_7
13.1 Move the shifter into seventh gear position and press "Start Button"
13.2 If your Shifter does not have a 7th gear keep the shifter in 6th position and press "Start Button"
Display will turn off again -> Calibration done!
The best way to check the calibration is to open the driver menu on PC to check if the right gears are engaged. If the game on PC still does not shift into the right gears please check the ingame button mapping! You can also see the process in our Video Manual:
Avant la première utilisation, le levier de vitesses en H (7GS) doit être calibré pour fonctionner correctement. L'étalonnage ne doit être effectué qu'une seule fois et sera sauvegardé dans le firmware. Cependant, il sera supprimé après toute mise à jour du firmware. Veuillez l'effectuer de nouveau après la mise à jour du volant.
Bevor die H-Schaltung verwendet werden kann, muss diese auf ihrem Lenkrad kalibriert werden. Die Kalibrierung muss nur ein mal durchgeführt werden und wird dann in der Firmware gespeichert. Nach einem Update der Firmware muss der Prozess nochmal durchgeführt werden. Vor der ersten Verwendung bzw. nach einem Firmware Update, führen sie bitte folgende Schritte durch:
1. Verbinden sie den H-Shifter mit dem "Shifter Port 1" ihres Lenkrades.
2. Schalten sie das Lenkrad ein
3. Warten sie bis die Boot- und Auto-Kalibrierungssequenz abgeschlossen ist.
4. Drücken sie "Tuning Button" + "Start Button" gleichzeitig. (Die Position dieser Tasten varriiert je nach Wheel Rim)
Das Display zeigt G_n
5. Bewegen sie den Shifter in die neutrale Position und drücken sie den "Start Button"
Das Display zeigt G_r
6. Bewegen sie den Shifter in die Position des Rückwärtsgangs (drücken sie die H-Schaltung ganz nach links und hoch) und drücken sie den "Start Button"
Das Display zeigt G_1
7. Bewegen sie den Shifter in den ersten Gang und drücken sie den "Start Button"
Das Display zeigt G_2
8. Bewegen sie den Shifter in den zweiten Gang und drücken sie den "Start Button"
Das Display zeigt G_3
9. Bewegen sie den Shifter in den dritten Gang und drücken sie den "Start Button"
Das Display zeigt G_4
10. Bewegen sie den Shifter in den vierten Gang und drücken sie den "Start Button"
Das Display zeigt G_5
11. Bewegen sie den Shifter in den fünften Gang und drücken sie den "Start Button"
Das Display zeigt G_6
12. Bewegen sie den Shifter in den sechsten Gang und drücken sie den "Start Button"
Das Display zeigt G_7
13.1 Bewegen sie den Shifter in den siebten Gang und drücken sie den "Start Button"
13.2 Wenn ihr Shifter keinen siebten Gang hat, belassen sie den Schalthebel in der Position des sechsten Gangs und drücken sie den "Start Button"
Das Display schaltet in das Tuning Menu -> Die Kalibrierung ist abgeschlossen!
Sie können auch im Video Manual sehen wie sich dieser Vorgang ausführen lässt:
最初に H-ゲート shifterを使用する前にはかならずきゃりぶレーションが必要となります。. キャリブレーションは一回のみ行う必要がありますが、情報がfirmwareに保存されるため、firmwareを更新 / フラッシュした場合には削除されます。 その場合再度The calibrationを行ってください。
1. H-gated shifter を をあなたのステアリングコントローラ"shifter port 1"に接続
2. ステアリングコントローラ電源オン
3. 自動キャリブレーションと自動シーケンスが完了まで待つ
4. "Tuning Button" + "Start Button"を同時に押す。(お使いのCSW rim によってこれらのボタンの位置は異なります。)
Display表示は G_n
5. シフターを へ移動して "Start Button"を押す
Display表示は G_r
6. シフターをリバース位置へ移動して(シフタースティックを押して左に合わせて上へ移動) の上 "Start Button"を押す
Display表示はG_1
7. シフターを first gear position へ移動して"Start Button"を押す。
Display表示はG_2
8. Mシフターを second gear position へ移動して"Start Button"を押す。
Display表示は G_3
9. シフターを Third gear position へ移動して"Start Button"を押す。
Display表示は G_4
10. シフターを fourth gear position へ移動して"Start Button"を押す。
Display表示は G_5
11. シフターを fith gear position へ移動して"Start Button"を押す。
Display表示はG_6
12. シフターを sixth gear position and press "Start Button"
Display表示はG_7
13.1 シフターを seventh gear position へ移動して"Start Button"を押す。
13.2 もしシフターに 7th gearがない場合 6th positionに入れたままで "Start Button"を押す
Display表示が消える -> キャリブレーション 完了!
もっともよいキャリブレーションのチェックの方はPCのドライバーメニューを開いて正しいギアが選択されているか確認すること。もしまだPCゲームでギア選択がうまくいかない場合 ゲームの中のマッピングボタンを確認してください。このプロセスはビデオマニュアルでも確認できます。
Please try the following software solution in order to resolve the issue:
- Reset your devices by following this guide: https://forum.fanatec.com/discussion/1758/symptom-fanatec-driver-does-not-install-uninstall-correctly
- Install the driver package again and update their firmware: https://fanatec.com/eu-en/driver
- Perform the firmware update for the wheel base and the motor driver through the Firmware Update manager. In case you received the message “Firmware is up to date” and you are not able to proceed, please select “Manual update” located in the top right corner of the firmware manager, then proceed with the update of the firmware.
In case the procedure above does not help, please reach out to technical support for further assistance.
Veuillez essayer la solution logicielle suivante afin de résoudre le problème :
1) Réinitialisez vos appareils en suivant ce guide : https://forum.fanatec.com/discussion/1758/symptom-fanatec-driver-does-not-install-uninstall-correctly
2) Installez à nouveau le pack de pilotes et mettez à jour leur firmware : https://fanatec.com/eu-en/driver
3) Effectuez la mise à jour du firmware de la roue et du pilote de moteur via le gestionnaire de mise à jour du micrologiciel. Le gestionnaire de mise à jour peut indiquer « Firmware is up to date », dans ce cas, cochez « Manual update » dans le gestionnaire de mise à jour du micrologiciel et procédez à la mise à jour (réinstallez) le firmware.
Si la procédure ci-dessus ne vous aide pas, veuillez contacter le support technique pour obtenir de l'aide.
Por favor intente la siguiente solución de software para resolver el problema:
1) Restablezca sus dispositivos siguiendo esta guía:
https://forum.fanatec.com/discussion/1758/symptom-fanatec-driver-does-not-install-uninstall-correctly
2) Instale el paquete de controladores de nuevo y actualice su firmware:
https://fanatec.com/eu-en/driver
3) Realice la actualización del firmware para la base de volante y el controlador del motor a través del Administrador de Actualizaciones de firmware (Firmware Update manager). El administrador de actualizaciones puede indicar que "El firmware está actualizado", en este caso marque en la casilla de verificación "Actualización manual" (Manual Update) en el gestor de actualizaciones de firmware y continuar con la actualización (reinstalación) del firmware.
En caso de que el procedimiento anterior no ayude, comuníquese con el soporte técnico para obtener más ayuda.
Si prega di provare la seguente soluzione software per risolvere il problema:
1) Ripristina i tuoi dispositivi seguendo questa guida: https://forum.fanatec.com/discussion/1758/symptom-fanatec-driver-does-not-install-uninstall-correctly
2) Installa nuovamente il pacchetto driver e aggiorna il firmware: https://fanatec.com/eu-en/driver
3) Eseguire l'aggiornamento del firmware per la base del volante e il driver del motore tramite il Firmware Update manager. Il gestore degli aggiornamenti può indicare "Il firmware è aggiornato", in questo caso selezionare "Aggiornamento manuale" nel gestore degli aggiornamenti del firmware e procedere con l'aggiornamento (reinstallare) il firmware.
Nel caso in cui la procedura di cui sopra non sia di aiuto, contattare il supporto tecnico per ulteriore assistenza.
Bitte führen Sie die folgenden Schritte aus um das Problem zu beheben:
1) Setzen Sie Ihre Geräte zurück, indem Sie diese Anleitung befolgen: https://forum.fanatec.com/discussion/1758/symptom-fanatec-driver-does-not-install-uninstall-correctly
2) Installieren Sie das Treiberpaket erneut und aktualisieren Sie die Firmware: https://fanatec.com/eu-de/driver
3) Führen Sie das Update für die Wheel Base und den Motor Treiber über den Firmware Update Manager durch. Sollte der Update Manager „Firmware is up to date“ anzeigen, wählen Sie „Manual Update“ im Firmware Update Manager aus und fahren Sie mit dem Update (Neuinstallieren) der Firmware fort.
Sollten die oben genannten Schritte das Problem nicht beheben, kontaktieren Sie bitte unseren Technischen Support.
With the new firmware manager, the ‘’Update’’ button will remain grey and not available in case you are having the latest firmware installed on your devices. This of course doesn’t mean that you are still not able to reflash/reinstall the firmware again. To make the option become available again, press the Manual Firmware Update button in the top right corner of the Firmware Manager window:

This will unlock the firmware update option for each device. You can then proceed and perform the firmware update/reflash on the device you wish:

Remarque : suivez les instructions ci-dessous uniquement lorsque vous êtes sûr à 100 % que la version du pilote PC est compatible avec vos produits Fanatec connectés. La dernière version du pilote PC est toujours disponible sur https://fanatec.com/driver .
Avec le nouveau gestionnaire de firmware, le bouton « Update » restera gris et non disponible au cas où vous auriez le dernier firmware installé sur vos appareils. Cela ne signifie bien sûr pas que vous ne pouvez toujours pas reflasher/réinstaller le firmware à nouveau. Pour que l'option redevienne disponible, appuyez sur le bouton Manual Firmware Update dans le coin supérieur droit de la fenêtre Firmware Manager :
Cela débloquera l'option de mise à jour du Firmware pour chaque appareil. Vous pouvez ensuite procéder et effectuer la mise à jour/reflashage du firmware sur l'appareil de votre choix :
Con el nuevo administrador de firmware (firmware updater), el botón de actualización (“Update”) permanecerá en gris y no estará disponible en caso de que tenga el firmware más reciente instalado en sus dispositivos. Esto por supuesto no significa que no pueda reflashear o reinstalar el firmware de nuevo. Para activar la opción una vez más, seleccione la opción de actualización manual del firmware (Manual Firmware Update) ubicada en la esquina superior derecha en la ventana del administrador de firmware.
Esto permitirá la opción de actualización de firmware para cada dispositivo. Entonces puede continuar y realizar la actualización de firmware o bien “reflashear” el dispositivo que desee.
Con il nuovo gestore del firmware, il pulsante "Aggiorna" rimarrà grigio e non disponibile nel caso in cui sui dispositivi sia installato il firmware più recente. Questo, ovviamente, non significa che non sei ancora in grado di eseguire nuovamente il reflash/reinstallare il firmware. Per rendere nuovamente disponibile l'opzione, premere il pulsante Aggiornamento manuale firmware nell'angolo in alto a destra della finestra Firmware Manager:
Questo sbloccherà l'opzione di aggiornamento del firmware per ogni dispositivo. Puoi quindi procedere ed eseguire l'aggiornamento/reflash del firmware sul dispositivo che desideri:
Mit dem neuen Firmware Manager wird der „Update“-Button ausgegraut und nicht verfügbar erscheinen, sofern die neueste Firmware bereits auf Ihren Geräten installiert ist. Dies bedeutet aber selbstverständlich nicht, dass Sie die Firmware nicht erneut installieren/flashen können. Um diese Funktion wieder verfügbar zu machen, setzen Sie ein Häkchen bei ‚Manual Firmware Update‘ in der oberen, rechten Ecke des Firmware Manager Fensters:
Dies ermöglicht die Option eines Firmware Updates für jedes Gerät. Sie können anschließend fortfahren und das Firmware Update für das gewünschte Produkt durchführen bzw. erneut flashen:
Every car in every game can have a different steering angle. In order to match your steering angle with the one of the car, you will need to have the ‘Sensitivity’ setting (in the tuning menu) set to ‘Auto’. Once this is done, you will have to re-calibrate the controller in the game.
As every game is different, some will require you to set the steering angle in the options menu. For example, in Assetto Corsa or Assetto Corsa Competizione, you will need to set the degrees in game and then apply the same setting in the tuning menu.
For Dirt Rally and Dirt Rally 2.0 for example, you will need to perform the calibration in game, then set the saturation to 63 and set the sensitivity in the tuning menu to 900 degrees in order to get the exact steering lock of the car in-game.
In case the steering angles are still not matching, please try check the following:
- Turn your steering wheel at 90 degrees.
- Open the tuning menu and go to the ‘Sensitivity’ setting
- Start reducing the sensitivity setting until the in-game steering wheel starts to match that of your steering wheel. Turn the wheel left and right, and check that it is now matching with the in-game steering wheel.
Some games may not have a realistic steering wheel animation, and will therefore be impossible to match with your steering wheel.
Chaque voiture dans chaque jeu peut avoir un angle de braquage différent. Afin de faire correspondre votre angle de braquage avec celui de la voiture, vous devrez régler le paramètre Sensibilité (dans le menu de réglage) sur Auto. Ensuite, vous devrez terminer le calibrage du contrôleur dans le jeu.
Si vous obtenez toujours un angle de braquage différent sur votre volant et dans la voiture dans le jeu, vous devrez alors vérifier les points suivants :
Comme chaque jeu est différent, certains jeux nécessitent de régler l'angle de braquage dans les paramètres. Par exemple, dans Assetto Corsa et Assetto Corsa Competizione, vous devrez définir les degrés en jeu, puis appliquer le même paramètre dans le menu de réglage. Ensuite, toutes les voitures seront assorties.
Pour Dirt Rally et Dirt Rally 2.0 par exemple, vous devrez effectuer le calibrage dans le jeu, puis régler la saturation sur 63 et régler la sensibilité dans le menu de réglage sur 900 degrés afin d'obtenir le verrouillage de direction exact de la voiture en Jeu.
Si le volant ne correspond toujours pas, procédez comme suit :
- Tournez votre volant à 90 degrés.
- Ouvrez le menu de réglage et allez dans le réglage ''Sensibilité''
- Commencez à réduire la sensibilité jusqu'à un point où vous voyez le volant sur l'écran correspondant à la position de votre propre volant. Tournez à gauche et à droite jusqu'au bout, jusqu'à ce que vous sentiez le soft lock (limite de rotation du volant) et vérifiez si la position du volant sur l'écran correspond à la vôtre.
Sachez que certains jeux n'ont pas d'animation réaliste de rotation du volant, il ne sera donc pas possible de faire correspondre le volant à l'écran avec le vôtre.
Cada coche en cada juego puede tener un ángulo de dirección diferente. Con el fin de hacer coincidir su ángulo de dirección con el del coche, usted tendrá que tener el ajuste de sensibilidad (en el menú de ajuste) establecido en automático. A continuación, tendrá que completar la calibración del controlador en el juego.
En caso de que usted todavía está recibiendo un ángulo de dirección diferente en el volante y en el coche en el juego, entonces usted tendrá que comprobar lo siguiente:
Como cada juego es diferente, algunos juegos requieren para establecer el ángulo de dirección en los ajustes. Por ejemplo, en Assetto Corsa y Assetto Corsa Competizione, deberá establecer los grados en el juego y luego aplicar la misma configuración en el menú de ajuste. Entonces todos los coches estarán a la par.
Para Dirt Rally y Dirt Rally 2.0, por ejemplo, deberá realizar la calibración en el juego, luego establecer la saturación en 63 y establecer la sensibilidad en el menú de ajuste a 900 grados para obtener el bloqueo de dirección exacto del automóvil en el juego.
En caso de que el volante no coincida todavía, realice lo siguiente:
- Gire el volante a 90 grados.
- Abra el menú de ajuste y vaya a la configuración de ''Sensibilidad'' (Sensitivity).
- Comience a reducir la sensibilidad a un punto, donde se ve el volante en la pantalla que coincide con la posición de su propio volante. Gire a la izquierda y a la derecha y todo el camino hasta que sienta el bloqueo suave y compruebe si la posición del volante en la pantalla coincide con la suya.
Por favor, sepa, que algunos juegos no tienen una animación de giro del volante realista, por lo tanto, no será posible hacer coincidir el volante en la pantalla con el suyo.
Ogni auto in ogni gioco può avere un angolo di sterzata diverso. Per far corrispondere il tuo angolo di sterzata a quello dell'auto, dovrai impostare la sensibilità (nel menu di messa a punto) su Auto. Quindi dovrai completare la calibrazione del controller nel gioco.
Nel caso in cui ottieni ancora un angolo di sterzata diverso sul volante e nell'auto nel gioco, dovrai controllare quanto segue:
Poiché ogni gioco è diverso, alcuni giochi richiedono di impostare l'angolo di sterzata nelle impostazioni. Ad esempio, in Assetto Corsa e Assetto Corsa Competizione, dovrai impostare i gradi nel gioco e quindi applicare la stessa impostazione nel menu di ottimizzazione. Quindi tutte le auto saranno corrispondenti.
Per Dirt Rally e Dirt Rally 2.0, ad esempio, sarà necessario eseguire la calibrazione nel gioco, quindi impostare la saturazione su 63 e impostare la sensibilità nel menu di regolazione su 900 gradi per ottenere l'esatto bloccasterzo dell'auto in gioco.
Nel caso in cui il volante non corrisponda ancora, eseguire le seguenti operazioni:
- Ruota il volante di 90 gradi.
- Apri il menu di sintonizzazione e vai all'impostazione "Sensibilità"
- Inizia a ridurre la sensibilità fino a un punto in cui vedi il volante sullo schermo che corrisponde alla posizione del tuo volante. Gira a sinistra e a destra e fino in fondo finché non senti il blocco morbido e controlla se la posizione del volante sullo schermo corrisponde alla tua.
Tieni presente che alcuni giochi non hanno un'animazione realistica del volante, quindi non sarà possibile abbinare il volante sullo schermo con il tuo.
Jedes Fahrzeug in jedem Spiel/Simulation kann einen unterschiedlichen Lenkwinkel haben. Um den Lenkwinkel Ihrer Hardware mit dem des Fahrzeugs in der Simulation anzupassen, müssen Sie das Sensitivity Setting (Im Tuning Menü) auf ‚Auto‘ stellen. Anschließend müssen Sie die Controller Kalibrierung im Spiel abschließen.
Falls Sie dennoch einen anderen Lenkwinkel als im Spiel haben, beachten Sie bitte folgendes:
Da jedes Spiel anders ist, müssen Sie bei einigen Spielen den Lenkwinkel in den Einstellungen einstellen. In Assetto Corsa und Assetto Corza Competizione müssen Sie beispielsweise die Gradzahl im Spiel einstellen und dann die gleiche Einstellung im Tuning-Menü anwenden. Dann passen alle Lenkwinkel der Fahrzeuge.
Für Dirt Rally 1 und 2 zum Beispiel, muss die Kalibrierung im Spiel vorgenommen werden, dann die Sättigung (Saturation) auf 63 gestellt werden und das Lenkrad auf 900° gestellt werden um den exakt gleichen Lenkwinkel wie beim Fahrzeug im Spiel einzustellen.
Sollte das Lenkrad immer noch nicht mit dem im Spiel übereinstimmen, führen Sie die folgenden Schritte durch:
- Drehen Sie Ihr Lenkrad auf 90°
- Öffnen Sie das Tuning Menu und die „Sensitivity“ Einstellung
- Beginnen Sie die Sensitivität zu senken, bis zu einem Punkt, an dem das Lenkrad auf dem Bildschirm im Spiel mit dem Lenkrad an Ihrer Wheel Base übereinstimmt. Drehen Sie das Lenkrad dann anschließend bis zum Anschlag links und rechts und überprüfen Sie, ob das Lenkrad, mit dem im Spiel übereinstimmt.
Bitte bedenken Sie, dass nicht jedes Spiel eine realistische Anzeige des Lenkrads im Fahrzeug anzeigt, bei diesen Spielen ist es leider nicht möglich, das Lenkrad mit dem im Spiel über den Bildschirm zu synchronisieren.
If the wheel base is unable to power up, please check the following:
- Is the power button clicking properly?
- Can you rule out visible damage on the power port on the wheel base?
If you answered yes to both of these questions, please follow the Troubleshooting Instructions below.
If you answered no to either of these questions, please open a support ticket via the affected product in your Fanatec account.
Troubleshooting Instructions:
Scenario 1
- Remove the steering wheel from your wheel base.
- If there are no hardware issues visible, press and hold the power button for 10 seconds while the wheel base is connected to a Windows PC (bootloader mode) with the latest Fanatec driver installed. This will prompt a pop up for a firmware update. Proceed with the update and power the base off and on again.
Scenario 2
- If you are using a Podium DD wheel base with a Kill Switch installed, please check if the Kill Switch button is unlocked. When powering the wheel base off by using the Kill Switch, the button itself stays pressed until it is manually unlocked. This can be done by turning the button clockwise, as shown by the arrows on it. Leaving it locked can result in problems with turning on your wheel base.
Scenario 3
If the PSU LED is off while the power supply is connected, please check the following:
- Inspect the power supply and cables for any damage (make sure the PSU is NOT plugged in/connected to a power socket)
- If there is no visible damage, please try connecting the PSU to a different wall socket (please avoid extension cords or power strips).
If none of these troubleshooting instructions resolved your issue, please reach out to our technical support for further assistance.
Si la roue ne peut pas s'allumer alors que le bloc d'alimentation ne présente aucun problème et que le voyant est allumé, veuillez vérifier les points suivants :
1. 1) Le bouton d'alimentation clique-t-il correctement ?
2. 2) Repérez-vous des dommages visibles sur le port d'alimentation de la roue ?
3. 3) Si aucun problème matériel n'est visible, essayez de démarrer la base en mode bootloader. Appuyez sur le bouton d'alimentation et maintenez-le enfoncé pendant 10 secondes pendant que la base est connectée à un PC Windows avec notre pilote installé. La mise à jour du micrologiciel s'affichera à l'écran. Procédez à la mise à jour et essayez de rallumer la base.
Si le voyant PSU est éteint alors que l'alimentation est connectée, veuillez vérifier les points suivants :
1. 1) Inspectez l'alimentation et les câbles pour tout dommage. (Assurez-vous que le bloc d'alimentation n'est PAS connecté au réseau électrique « multiprise » !)
2. 2) S'il n'y a aucun dommage visible, veuillez essayer de connecter le bloc d'alimentation à une autre prise murale.
Si le voyant d'alimentation ne s'allume pas ou si le dépannage ci-dessus ne vous aide pas, veuillez contacter notre support technique pour obtenir de l'aide.
En caso de que la base del volante no pueda encenderse aun cuando el suministro eléctrico no muestra problemas y el LED está encendido, compruebe lo siguiente:
1) ¿El botón de encendido está haciendo clic correctamente?
2) ¿Detecta algún daño visible en el puerto de alimentación de la base?
En caso de que el LED de la unidad de fuente de poder (PSU) esté apagada mientras está conectada, compruebe lo siguiente:
1) Inspeccione la fuente de poder y los cables en busca de cualquier daño. (¡Asegúrese desconectarla de la red eléctrica primero!)
2) Si no hay ningún daño visible, por favor intente conectar la PSU a un enchufe de pared diferente.
Si el LED de la fuente de poder no se enciende o la solución de problemas anterior no ayuda, comuníquese con nuestro soporte técnico para obtener más ayuda.
Nel caso in cui la base del volante non sia in grado di accendersi mentre l'alimentatore non mostra problemi e il LED su di esso è acceso, controllare quanto segue:
1. 1) Il pulsante di accensione fa clic correttamente?
2. 2) Rilevi danni visibili sulla presa di alimentazione nella base del volante?
3. 3) Nel caso in cui non siano visibili problemi hardware, provare ad avviare la base in modalità bootloader. Tieni premuto il pulsante di accensione per 10 secondi mentre la base è collegata a un PC Windows con il nostro driver installato. L'aggiornamento del firmware verrà visualizzato sullo schermo. Procedi con l'aggiornamento e prova a riaccendere la base.
Nel caso in cui il LED dell'alimentatore sia spento mentre l'alimentatore è collegato, verificare quanto segue:
1. 1) Ispezionare l'alimentatore ei cavi per eventuali danni. (Assicurarsi che l'alimentatore NON sia collegato alla rete elettrica!)
2. 2) Se non ci sono danni visibili, provare a collegare l'alimentatore a un'altra presa a muro.
Se il LED dell'alimentatore non si accende o la risoluzione dei problemi di cui sopra non aiuta, contattare il nostro supporto tecnico per ulteriore assistenza.
Wenn sich die Wheel Base nicht einschalten lässt, überprüfen Sie bitte Folgendes:
- Klickt der Einschaltknopf richtig?
- Können Sie eine sichtbare Beschädigung des Stromanschlusses an der Wheel Base ausschließen?
Wenn Sie beide Fragen mit Ja beantwortet haben, folgen Sie bitte den nachstehenden Anweisungen zur Fehlerbehebung.
Wenn Sie eine dieser Fragen mit Nein beantwortet haben, eröffnen Sie bitte ein Support-Ticket über das betroffene Produkt in Ihrem Fanatec-Konto.
Anweisungen zur Fehlerbehebung:
Szenario 1
- Entfernen Sie das Lenkrad von Ihrer Wheel Base.
- Wenn keine Hardware-Probleme sichtbar sind, halten Sie die Einschalttaste 10 Sekunden lang gedrückt, während die Wheel Base mit einem Windows-PC (Bootloader-Modus) verbunden ist, auf dem der neueste Fanatec-Treiber installiert ist.
- Daraufhin erscheint ein Pop-up-Fenster mit der Aufforderung, ein Firmware-Update durchzuführen. Fahren Sie mit dem Update fort und schalten Sie die Wheel Base aus und wieder ein.
Szenario 2
- Wenn Sie eine Podium DD Wheel Base mit installiertem Kill Switch verwenden, überprüfen Sie bitte, ob der Kill Switch-Knopf entriegelt ist.
- Wenn Sie die Wheel Base mit dem Kill Switch ausschalten, bleibt die Taste gedrückt, bis sie manuell entriegelt wird. Dies kann durch Drehen des Schalters im Uhrzeigersinn geschehen, wie durch die Pfeile auf dem Schalter angezeigt. Wenn Sie ihn nicht entriegeln, kann es zu Problemen beim Einschalten Ihrer Wheel Base kommen.
Szenario 3
Wenn die PSU-LED nicht leuchtet, während das Netzteil angeschlossen ist, überprüfen Sie bitte die folgenden Punkte:
- Überprüfen Sie das Netzteil und die Kabel auf Beschädigungen (stellen Sie sicher, dass das Netzteil NICHT in eine Steckdose eingesteckt/angeschlossen ist).
- Wenn keine sichtbaren Schäden vorhanden sind, versuchen Sie bitte, das Netzteil an eine andere Steckdose anzuschließen (vermeiden Sie bitte Verlängerungskabel oder Steckdosenleisten).
Wenn keine dieser Anweisungen zur Fehlerbehebung Ihr Problem gelöst hat, wenden Sie sich bitte an unseren technischen Support, um weitere Unterstützung zu erhalten.