


Sold out
Further links
Features
- Ultra strong brushless servo motor which delivers up to 6Nm of torque on the steering axis
- Single Belt Drive unit for direct power transfer from motor to steering axis and with big ball bearings for lowest friction
- Very fast steering wheel acceleration - ideal for drifting
- 1080° of rotation which can be adjusted in the tuning menu of the attached Steering Wheel
- Integrated rev light bar in the Wheel Base
- Choose from a growing selection of very realistic Steering Wheels in many different styles
- Quick Release system to allow the easy exchange of Steering Wheels within seconds, also during gameplay
- Supports vibration motors in the steering wheel (depending on the steering wheel model)
- Mount for ClubSport Static Shifter Paddles and other optional accessories
- Table clamp included. Thickness range of the table board/desktop that the table clamp is able to lock is 1,0 to 6,0 cm
- Firmware can be updated with new features
- Fast 500 Hz USB update rate
- Allows connection of two external shifters (e.g. H-pattern and sequential) in parallel
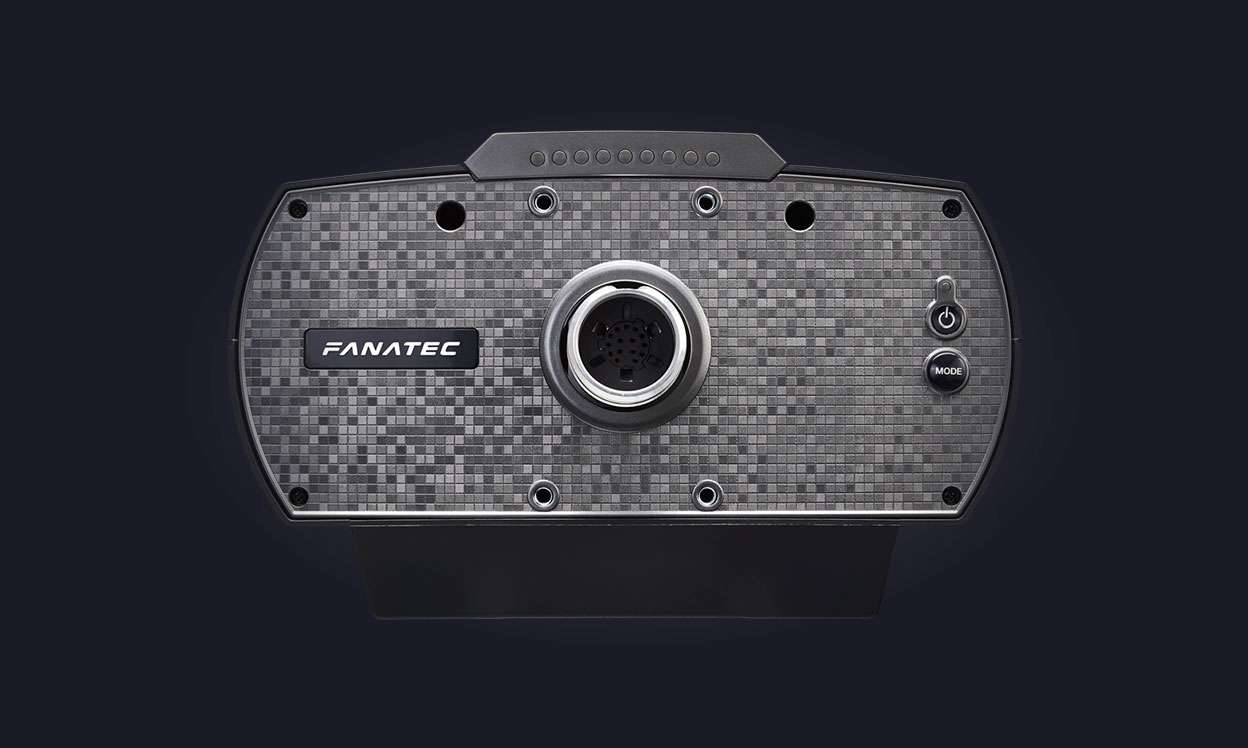
- Connection ports for peripheral devices: USB, Power, Pedals, Shifter 1, Shifter 2, Handbrake
- Tuning functions* with LED display of the steering wheel to adjust settings independent from the game and during gameplay
- Saves up to 5 wheel set-ups
- Adjust sensitivity independent from the game. Turning angle can be adjusted in the wheel from 90° to 1080°
- Adjust force feedback strength during game play
- Adjustment for vibration intensity in the steering wheel (depending on the steering wheel model). The vibration motors can be used by a game directly or by the ABS function
- Simulate ABS vibration in the steering wheel (depending on the steering wheel model) and on pedals with rumble motor like the ClubSport Pedals V3 by setting a starting point at % of brake input
- Change the linearity in the steering axis to get the precision of a 1080° wheel and the fast movement of a 270° wheel
- Add some artificial dead zone to avoid shaking on straights if needed
- Use the drift mode to reduce the overall resistance of the wheel and let it turn more easily, almost like adjustable power steering
- Customize the force feedback sensations by changing the spring, force effects and dampening forces
- Adjust the brake force sensitivity of compatible loadcell pedals like the ClubSport Pedals V3 or the CSL Elite Pedals LC
- * Tuning functions are subject to change.
Compatibility
Peripherals
- All Fanatec ClubSport Steering Wheels
- All Fanatec CSL Steering Wheels
- All Fanatec ClubSport, CSR, CSR Elite, CSL and CSL Elite Pedals
- All Fanatec Shifters (two shifters simultaneously)
- Fanatec ClubSport Static Shifter Paddles
- Fanatec ClubSport Handbrake (direct connection to Wheel Base)
- Mounting on Cockpits and Wheel Stands: 3 hard-mount points on the bottom of the Wheel Base. Please refer to the drilling template in the download section for the hole pattern and distances. The hole pattern is identical with the ClubSport Wheel Bases without the angle adapter (3 hard-mount holes). Please take not that the CSL Elite Wheel Base hole pattern is NOT compatible to the the CSL Seat.
Platforms
- PC: This wheel base is compatible with PC when combined with a Fanatec Steering Wheel. Check the individual Steering Wheel product pages for Wheel Base compatibility.
- Xbox®: This wheel base becomes compatible with Xbox One® and Xbox Series X|S when used with any Fanatec Xbox-licensed steering wheel.
- PlayStation®: This product is not compatible with any PlayStation® console and cannot be upgraded to achieve compatibility.
Special Notes
- This is only the Wheel Base unit. In order to drive a sim race you need several other items. Please use the product configurator to configure your system.
- NO steering wheel included! You need a CSL or ClubSport Steering Wheel to operate this product.
- NO pedals included
- Table clamp included. You can also mount it with screws to a cockpit or wheel stand (see drilling template in download section).
- NO hard-mount screws included. Please read the manual for information about qualified screws.
- To connect discontinued Fanatec Pedals with PS/2 Socket like CSP v1/v2 or CSR, you need the additional PS/2 to RJ12 cable.
Packaging Details
- Dimensions (L x W x H) 35cm x 35cm x 28cm
- Weight 4.6kg
- Volume weight 4.6kg
What's included
- CSL Elite Wheel Base
- Table Clamp
- Quick guide
- Power supply (cables: socket to power supply 1,5 m/6 ft.; power supply to wheel base 1,5 m/6 ft)
- USB cable (2 m/6 ft.)
At the moment, the products we have available in our webshop are only compatible with Windows PC ( WIN 7, 8, 10 and 11), PS4, PS5, Xbox One and Xbox Series X. Mac OS or other systems are currently not supported.
Note: Console compatibility is limited for each product! Please check the compatibility section of the product page for each device for more information.
Derzeit sind alle Produkte, die im Webshop verfügbar sind, nur mit Windows PC (Win 7, 8, 10 und 11), PlayStation 4, 5 und Xbox One, Xbox Series X kompatibel. Andere System werden nicht unterstützt.
Die Funktionen der einzelnen Produkte können auf den Konsolen eingeschränkt sein. Daher empfehlen wir die Produktbeschreibungen der einzelnen Produkte genau zu überprüfen.
MacでFanatecギアを使用できますか?
現時点では、ウェブショップで入手できる製品は、Windows PC、PS4、PS5、Xbox One、Xbox SeriesXとのみ互換性があります。Mac OSは現在対応されていません。
注:コンソールの互換性は、製品ごとに制限されています。詳細については、各デバイスの製品ページの互換性セクションを確認してください。
We are often asked if you can use Thrustmaster or Logitech wheels, pedals, shifters or other accessories in combination with Fanatec hardware. In general the devices of different vendors are not compatible to each other. Therefore, you cannot directly connect products from different companies to each other or at least this is not supported.
In the past there have been adapters which might have worked to make such combinations possible but those solutions have not been reliable due to different techniques used in the hardware and different signal tolerances even if similar specs have been used. Fanatec cannot make any statements about third party adapters or similar solutions. We are putting a lot of effort into the goal of having the highest possible intercompatibility in between all our devices, which is not that easy to achieve. For any questions about compatibility we can only direct you to the information given on our product pages or within our FAQs.
The statement above is valid for every platform (especially on consoles!) EXCEPT PC...since you can connect multiple, individual USB devices there IF the game/simulation supports that.
This gives you multiple options to combine hardware of different vendors the way you want. Most simulation games on Windows PCs will allow you to use combinations like: Logitech wheel, Thrustmaster shifter and Fanatec pedals for example. Since Fanatec provides USB solutions for more or less every kind of hardware (shifter/handbrake by USB adapter, USB pedals, USB wheels, etc.) the possibilities to build your perfect setup are endless.
Even if it is very common, please be so kind to make some research on the web or ask the simulation developer if multiple USB devices are supported.
Wir werden oft gefragt, ob man Thrustmaster- oder Logitech-Racing Wheels, -Pedale, -Schalthebel oder anderes Zubehör in Kombination mit FANATEC-Hardware verwenden kann.
In der Regel sind die Geräte der verschiedenen Hersteller nicht miteinander kompatibel. Daher können Sie Produkte verschiedener Firmen nicht direkt miteinander verbinden oder zumindest wird dies nicht unterstützt.
In der Vergangenheit gab es zwar einen Adapter, der solche Kombinationen ermöglicht hat, aber diese Lösung ist aufgrund unterschiedlicher Techniken in der Hardware und unterschiedlicher Signaltoleranzen nicht mehr möglich, selbst wenn ähnliche Spezifikationen verwendet wurden.
FANATEC kann keine Aussagen oder Empfehlungen zu Adaptern von Drittanbietern oder ähnlichen Lösungen geben. Bei Fragen zur Kompatibilität können wir Sie nur auf die Informationen auf unseren Produktseiten oder in unseren FAQs verweisen.
Die obige Aussage gilt für jede Plattform, (vor allem auf Konsolen!) außer PC, da Sie dort mehrere einzelne USB-Geräte anschließen können, wenn das Spiel bzw. die Simulation dies auch unterstützt. Auch wenn es durchaus üblich ist, recherchieren Sie bitte im Internet oder fragen Sie den Simulationsentwickler, ob mehrere USB-Geräte unterstützt werden.
Dadurch haben Sie mehrere Möglichkeiten, Hardware verschiedener Hersteller so zu kombinieren, wie Sie es wünschen. Bei den meisten Simulationsspielen auf Windows-PCs können Sie Kombinationen verwenden wie:
Zum Beispiel Logitech Lenkrad, Thrustmaster Shifter und FANATEC Pedale. Da FANATEC USB-Lösungen für mehr oder weniger jede Art von Hardware anbietet (Schalthebel/Handbremse per USB-Adapter, USB-Pedale usw.), sind die Möglichkeiten, Ihr perfektes Setup aufzubauen, nahezu endlos.
There is a 32 bit and a 64 bit version of a Fanatec driver available. It depends on the "system type" of your PC which of those versions you need to choose. If the system type of your PC has a 32 bit operation system, you need the 32 bit version of the driver. If the system type of your PC has the 64 bit operation system, you will need the 64 bit version.
For finding this information go to the "Control Panel" of your PC -> "System and Security" -> System:

Es gibt eine 32 bit und eine 64 bit Version des Fanatec Treibers. Welche Treiber Version ausgewählt werden muss, hängt von dem jeweiligen "System Typ" des PC´s ab. Wenn Ihr PC ein 32 bit Betriessystem hat, benötigen Sie die 32 bit Version, wenn es ein 64 bit Betriebssystem ist, benötigen Sie die 64 bit Version.
Sie finden diese Information unter "Systemsteuerung" -> "System und Sicherheit" -> "System":

When using the CSL Elite Wheel base, it is possible that the motor generates audible force feedback noises, and sometimes violent force feedback effects when you are going off track, or driving over kerbs. The CSL E WB has an exceptionally strong force feedback motor which generates torques up to 6Nm, and is ~40% stronger than average force feedback wheels made from synthetic material. Additionally, the "single drive" system has been designed to directly deliver all forces straight to the steering wheel and to your hands which will lead to a higher sound level due to the plastic construction of the housing.
Lors de l'utilisation de la base de volant CSL Elite, il est possible que le puissant moteur génère des sons de retour de force clairement audibles, en particulier lorsque le jeu envoie des effets de retour de force puissants et parfois violents lorsque vous franchissez des bordures ou hors de la piste. Le CSL E WB est doté d'un moteur à retour de force exceptionnellement puissant qui génère des couples jusqu'à 6 Nm, ce qui est ~ 40% plus fort que la moyenne de retour de force des bases en matériau synthétique. De plus, le système « single drive » a été conçu pour fournir toutes les forces directement au volant et à vos mains, ce qui conduira à un niveau sonore plus élevé. Une unité en métal lourd comme le CSW V2 peut absorber ces forces violentes plus facilement, mais sans surprise, cela a un coût plus élevé.
Al usar la base CSL Elite Wheel base, es posible que el fuerte motor genere sonidos por el Force Feedback, especialmente cuando el juego envía efectos de FFB violentos o fuertes cuando se sale de la pista o al recorrer curvas.
La base CSL Elite Wheel Base tiene un motor de FFB excepcionalmente fuerte, que genera una torsión de hasta 6 Newtonmeters que es aproximadamente 40% más fuerte que el promedio de las bases con Force feedback hechas de materiales sintéticos.
Adicionalmente cada sistema “single drive” ha sido diseñado para que pueda emitir toda la fuerza directamente al volante y a sus manos, lo cual puede generar mayor nivel de sonido. Una unidad de metal sólido como la CSW v2 puede absorber tales fuerzas violentas con mayor facilidad, pero no debe de sorprenderse de que esto conlleve un mayor costo.
Quando si utilizza la base del CSL Elite è possibile che la potenza del motore generi suoni di forza di riscontro chiaramente udibili. Specialmente quando il gioco invia effetti di riscontro di forza robusti e talvolta violenti quando si superano i cordoli o si esce fuori pista. Il CSL E WB ha un motore eccezionalmente potente che genera coppie fino a 6 Nm, che è ~ 40% più forte delle altre basi realizzate in materiale sintetico. Inoltre, il sistema "single drive" è stato progettato per fornire direttamente tutta la forza direttamente al volante e alle mani, il che porta a un livello sonoro più elevato. Un'unità fatta di metalli robusti come il CSW V2 può assorbire queste violenti forze, per questo non bisogna essere sorpresi che l’unita ha un costo maggiore della media.
Die CSL Elite Wheel Bases erzeugen deutlich hörbare Geräusche, sobald eingehende Force Feedback Signale umgesetzt werden. Solche Geräusche können wahrgenommen werden beim Überfahren von Kurbs, wenn das Auto von der Strecke abkommt oder zum Beispiel bei Fahrten über unbefestigte Untergründe, wie es in Rallye Spiele üblich ist.
Der verbaute Brushless Motor leistet bis zu 6 Nm (Newtonmeter) und das entspricht ca. 40 % mehr Kraft als bei vergleichbaren Modellen in diesem Preissegment.
Das Riemensystem wurde so gestaltet, dass alle erzeugbaren Force Feedback Signale mit so wenig Schwund wie nur möglich ans Lenkrad weitergeben werden. Durch dieses spezielle System wird dem Anwender ermöglicht, selbst die feinsten Force Feedback Signalen spüren zu können.
Das Gehäuse der CSL Elite Wheel Bases ist aus Kunststoff gefertigt und anders als bei schwereren Geräten mit einem Metallgehäuse wie zum Beispiel bei der ClubSport Wheel Base V2.5 ist somit eine Dämpfung aller mechanischen erzeugten Geräusche über das Gehäuse bzw. über das höhere Eigengewicht von der Wheel Base selber nicht möglich. Es ist aber auch zu erwähnen, dass dies sich im Preis widerspiegelt.
With the new firmware manager, the ‘’Update’’ button will remain grey and not available in case you are having the latest firmware installed on your devices. This of course doesn’t mean that you are still not able to reflash/reinstall the firmware again. To make the option become available again, press the Manual Firmware Update button in the top right corner of the Firmware Manager window:

This will unlock the firmware update option for each device. You can then proceed and perform the firmware update/reflash on the device you wish:

Remarque : suivez les instructions ci-dessous uniquement lorsque vous êtes sûr à 100 % que la version du pilote PC est compatible avec vos produits Fanatec connectés. La dernière version du pilote PC est toujours disponible sur https://fanatec.com/driver .
Avec le nouveau gestionnaire de firmware, le bouton « Update » restera gris et non disponible au cas où vous auriez le dernier firmware installé sur vos appareils. Cela ne signifie bien sûr pas que vous ne pouvez toujours pas reflasher/réinstaller le firmware à nouveau. Pour que l'option redevienne disponible, appuyez sur le bouton Manual Firmware Update dans le coin supérieur droit de la fenêtre Firmware Manager :
Cela débloquera l'option de mise à jour du Firmware pour chaque appareil. Vous pouvez ensuite procéder et effectuer la mise à jour/reflashage du firmware sur l'appareil de votre choix :
Con el nuevo administrador de firmware (firmware updater), el botón de actualización (“Update”) permanecerá en gris y no estará disponible en caso de que tenga el firmware más reciente instalado en sus dispositivos. Esto por supuesto no significa que no pueda reflashear o reinstalar el firmware de nuevo. Para activar la opción una vez más, seleccione la opción de actualización manual del firmware (Manual Firmware Update) ubicada en la esquina superior derecha en la ventana del administrador de firmware.
Esto permitirá la opción de actualización de firmware para cada dispositivo. Entonces puede continuar y realizar la actualización de firmware o bien “reflashear” el dispositivo que desee.
Con il nuovo gestore del firmware, il pulsante "Aggiorna" rimarrà grigio e non disponibile nel caso in cui sui dispositivi sia installato il firmware più recente. Questo, ovviamente, non significa che non sei ancora in grado di eseguire nuovamente il reflash/reinstallare il firmware. Per rendere nuovamente disponibile l'opzione, premere il pulsante Aggiornamento manuale firmware nell'angolo in alto a destra della finestra Firmware Manager:
Questo sbloccherà l'opzione di aggiornamento del firmware per ogni dispositivo. Puoi quindi procedere ed eseguire l'aggiornamento/reflash del firmware sul dispositivo che desideri:
Mit dem neuen Firmware Manager wird der „Update“-Button ausgegraut und nicht verfügbar erscheinen, sofern die neueste Firmware bereits auf Ihren Geräten installiert ist. Dies bedeutet aber selbstverständlich nicht, dass Sie die Firmware nicht erneut installieren/flashen können. Um diese Funktion wieder verfügbar zu machen, setzen Sie ein Häkchen bei ‚Manual Firmware Update‘ in der oberen, rechten Ecke des Firmware Manager Fensters:
Dies ermöglicht die Option eines Firmware Updates für jedes Gerät. Sie können anschließend fortfahren und das Firmware Update für das gewünschte Produkt durchführen bzw. erneut flashen:
Every car in every game can have a different steering angle. In order to match your steering angle with the one of the car, you will need to have the ‘Sensitivity’ setting (in the tuning menu) set to ‘Auto’. Once this is done, you will have to re-calibrate the controller in the game.
As every game is different, some will require you to set the steering angle in the options menu. For example, in Assetto Corsa or Assetto Corsa Competizione, you will need to set the degrees in game and then apply the same setting in the tuning menu.
For Dirt Rally and Dirt Rally 2.0 for example, you will need to perform the calibration in game, then set the saturation to 63 and set the sensitivity in the tuning menu to 900 degrees in order to get the exact steering lock of the car in-game.
In case the steering angles are still not matching, please try check the following:
- Turn your steering wheel at 90 degrees.
- Open the tuning menu and go to the ‘Sensitivity’ setting
- Start reducing the sensitivity setting until the in-game steering wheel starts to match that of your steering wheel. Turn the wheel left and right, and check that it is now matching with the in-game steering wheel.
Some games may not have a realistic steering wheel animation, and will therefore be impossible to match with your steering wheel.
Chaque voiture dans chaque jeu peut avoir un angle de braquage différent. Afin de faire correspondre votre angle de braquage avec celui de la voiture, vous devrez régler le paramètre Sensibilité (dans le menu de réglage) sur Auto. Ensuite, vous devrez terminer le calibrage du contrôleur dans le jeu.
Si vous obtenez toujours un angle de braquage différent sur votre volant et dans la voiture dans le jeu, vous devrez alors vérifier les points suivants :
Comme chaque jeu est différent, certains jeux nécessitent de régler l'angle de braquage dans les paramètres. Par exemple, dans Assetto Corsa et Assetto Corsa Competizione, vous devrez définir les degrés en jeu, puis appliquer le même paramètre dans le menu de réglage. Ensuite, toutes les voitures seront assorties.
Pour Dirt Rally et Dirt Rally 2.0 par exemple, vous devrez effectuer le calibrage dans le jeu, puis régler la saturation sur 63 et régler la sensibilité dans le menu de réglage sur 900 degrés afin d'obtenir le verrouillage de direction exact de la voiture en Jeu.
Si le volant ne correspond toujours pas, procédez comme suit :
- Tournez votre volant à 90 degrés.
- Ouvrez le menu de réglage et allez dans le réglage ''Sensibilité''
- Commencez à réduire la sensibilité jusqu'à un point où vous voyez le volant sur l'écran correspondant à la position de votre propre volant. Tournez à gauche et à droite jusqu'au bout, jusqu'à ce que vous sentiez le soft lock (limite de rotation du volant) et vérifiez si la position du volant sur l'écran correspond à la vôtre.
Sachez que certains jeux n'ont pas d'animation réaliste de rotation du volant, il ne sera donc pas possible de faire correspondre le volant à l'écran avec le vôtre.
Cada coche en cada juego puede tener un ángulo de dirección diferente. Con el fin de hacer coincidir su ángulo de dirección con el del coche, usted tendrá que tener el ajuste de sensibilidad (en el menú de ajuste) establecido en automático. A continuación, tendrá que completar la calibración del controlador en el juego.
En caso de que usted todavía está recibiendo un ángulo de dirección diferente en el volante y en el coche en el juego, entonces usted tendrá que comprobar lo siguiente:
Como cada juego es diferente, algunos juegos requieren para establecer el ángulo de dirección en los ajustes. Por ejemplo, en Assetto Corsa y Assetto Corsa Competizione, deberá establecer los grados en el juego y luego aplicar la misma configuración en el menú de ajuste. Entonces todos los coches estarán a la par.
Para Dirt Rally y Dirt Rally 2.0, por ejemplo, deberá realizar la calibración en el juego, luego establecer la saturación en 63 y establecer la sensibilidad en el menú de ajuste a 900 grados para obtener el bloqueo de dirección exacto del automóvil en el juego.
En caso de que el volante no coincida todavía, realice lo siguiente:
- Gire el volante a 90 grados.
- Abra el menú de ajuste y vaya a la configuración de ''Sensibilidad'' (Sensitivity).
- Comience a reducir la sensibilidad a un punto, donde se ve el volante en la pantalla que coincide con la posición de su propio volante. Gire a la izquierda y a la derecha y todo el camino hasta que sienta el bloqueo suave y compruebe si la posición del volante en la pantalla coincide con la suya.
Por favor, sepa, que algunos juegos no tienen una animación de giro del volante realista, por lo tanto, no será posible hacer coincidir el volante en la pantalla con el suyo.
Ogni auto in ogni gioco può avere un angolo di sterzata diverso. Per far corrispondere il tuo angolo di sterzata a quello dell'auto, dovrai impostare la sensibilità (nel menu di messa a punto) su Auto. Quindi dovrai completare la calibrazione del controller nel gioco.
Nel caso in cui ottieni ancora un angolo di sterzata diverso sul volante e nell'auto nel gioco, dovrai controllare quanto segue:
Poiché ogni gioco è diverso, alcuni giochi richiedono di impostare l'angolo di sterzata nelle impostazioni. Ad esempio, in Assetto Corsa e Assetto Corsa Competizione, dovrai impostare i gradi nel gioco e quindi applicare la stessa impostazione nel menu di ottimizzazione. Quindi tutte le auto saranno corrispondenti.
Per Dirt Rally e Dirt Rally 2.0, ad esempio, sarà necessario eseguire la calibrazione nel gioco, quindi impostare la saturazione su 63 e impostare la sensibilità nel menu di regolazione su 900 gradi per ottenere l'esatto bloccasterzo dell'auto in gioco.
Nel caso in cui il volante non corrisponda ancora, eseguire le seguenti operazioni:
- Ruota il volante di 90 gradi.
- Apri il menu di sintonizzazione e vai all'impostazione "Sensibilità"
- Inizia a ridurre la sensibilità fino a un punto in cui vedi il volante sullo schermo che corrisponde alla posizione del tuo volante. Gira a sinistra e a destra e fino in fondo finché non senti il blocco morbido e controlla se la posizione del volante sullo schermo corrisponde alla tua.
Tieni presente che alcuni giochi non hanno un'animazione realistica del volante, quindi non sarà possibile abbinare il volante sullo schermo con il tuo.
Jedes Fahrzeug in jedem Spiel/Simulation kann einen unterschiedlichen Lenkwinkel haben. Um den Lenkwinkel Ihrer Hardware mit dem des Fahrzeugs in der Simulation anzupassen, müssen Sie das Sensitivity Setting (Im Tuning Menü) auf ‚Auto‘ stellen. Anschließend müssen Sie die Controller Kalibrierung im Spiel abschließen.
Falls Sie dennoch einen anderen Lenkwinkel als im Spiel haben, beachten Sie bitte folgendes:
Da jedes Spiel anders ist, müssen Sie bei einigen Spielen den Lenkwinkel in den Einstellungen einstellen. In Assetto Corsa und Assetto Corza Competizione müssen Sie beispielsweise die Gradzahl im Spiel einstellen und dann die gleiche Einstellung im Tuning-Menü anwenden. Dann passen alle Lenkwinkel der Fahrzeuge.
Für Dirt Rally 1 und 2 zum Beispiel, muss die Kalibrierung im Spiel vorgenommen werden, dann die Sättigung (Saturation) auf 63 gestellt werden und das Lenkrad auf 900° gestellt werden um den exakt gleichen Lenkwinkel wie beim Fahrzeug im Spiel einzustellen.
Sollte das Lenkrad immer noch nicht mit dem im Spiel übereinstimmen, führen Sie die folgenden Schritte durch:
- Drehen Sie Ihr Lenkrad auf 90°
- Öffnen Sie das Tuning Menu und die „Sensitivity“ Einstellung
- Beginnen Sie die Sensitivität zu senken, bis zu einem Punkt, an dem das Lenkrad auf dem Bildschirm im Spiel mit dem Lenkrad an Ihrer Wheel Base übereinstimmt. Drehen Sie das Lenkrad dann anschließend bis zum Anschlag links und rechts und überprüfen Sie, ob das Lenkrad, mit dem im Spiel übereinstimmt.
Bitte bedenken Sie, dass nicht jedes Spiel eine realistische Anzeige des Lenkrads im Fahrzeug anzeigt, bei diesen Spielen ist es leider nicht möglich, das Lenkrad mit dem im Spiel über den Bildschirm zu synchronisieren.
If the wheel base is unable to power up, please check the following:
- Is the power button clicking properly?
- Can you rule out visible damage on the power port on the wheel base?
If you answered yes to both of these questions, please follow the Troubleshooting Instructions below.
If you answered no to either of these questions, please open a support ticket via the affected product in your Fanatec account.
Troubleshooting Instructions:
Scenario 1
- Remove the steering wheel from your wheel base.
- If there are no hardware issues visible, press and hold the power button for 10 seconds while the wheel base is connected to a Windows PC (bootloader mode) with the latest Fanatec driver installed. This will prompt a pop up for a firmware update. Proceed with the update and power the base off and on again.
Scenario 2
- If you are using a Podium DD wheel base with a Kill Switch installed, please check if the Kill Switch button is unlocked. When powering the wheel base off by using the Kill Switch, the button itself stays pressed until it is manually unlocked. This can be done by turning the button clockwise, as shown by the arrows on it. Leaving it locked can result in problems with turning on your wheel base.
Scenario 3
If the PSU LED is off while the power supply is connected, please check the following:
- Inspect the power supply and cables for any damage (make sure the PSU is NOT plugged in/connected to a power socket)
- If there is no visible damage, please try connecting the PSU to a different wall socket (please avoid extension cords or power strips).
If none of these troubleshooting instructions resolved your issue, please reach out to our technical support for further assistance.
Si la roue ne peut pas s'allumer alors que le bloc d'alimentation ne présente aucun problème et que le voyant est allumé, veuillez vérifier les points suivants :
1. 1) Le bouton d'alimentation clique-t-il correctement ?
2. 2) Repérez-vous des dommages visibles sur le port d'alimentation de la roue ?
3. 3) Si aucun problème matériel n'est visible, essayez de démarrer la base en mode bootloader. Appuyez sur le bouton d'alimentation et maintenez-le enfoncé pendant 10 secondes pendant que la base est connectée à un PC Windows avec notre pilote installé. La mise à jour du micrologiciel s'affichera à l'écran. Procédez à la mise à jour et essayez de rallumer la base.
Si le voyant PSU est éteint alors que l'alimentation est connectée, veuillez vérifier les points suivants :
1. 1) Inspectez l'alimentation et les câbles pour tout dommage. (Assurez-vous que le bloc d'alimentation n'est PAS connecté au réseau électrique « multiprise » !)
2. 2) S'il n'y a aucun dommage visible, veuillez essayer de connecter le bloc d'alimentation à une autre prise murale.
Si le voyant d'alimentation ne s'allume pas ou si le dépannage ci-dessus ne vous aide pas, veuillez contacter notre support technique pour obtenir de l'aide.
En caso de que la base del volante no pueda encenderse aun cuando el suministro eléctrico no muestra problemas y el LED está encendido, compruebe lo siguiente:
1) ¿El botón de encendido está haciendo clic correctamente?
2) ¿Detecta algún daño visible en el puerto de alimentación de la base?
En caso de que el LED de la unidad de fuente de poder (PSU) esté apagada mientras está conectada, compruebe lo siguiente:
1) Inspeccione la fuente de poder y los cables en busca de cualquier daño. (¡Asegúrese desconectarla de la red eléctrica primero!)
2) Si no hay ningún daño visible, por favor intente conectar la PSU a un enchufe de pared diferente.
Si el LED de la fuente de poder no se enciende o la solución de problemas anterior no ayuda, comuníquese con nuestro soporte técnico para obtener más ayuda.
Nel caso in cui la base del volante non sia in grado di accendersi mentre l'alimentatore non mostra problemi e il LED su di esso è acceso, controllare quanto segue:
1. 1) Il pulsante di accensione fa clic correttamente?
2. 2) Rilevi danni visibili sulla presa di alimentazione nella base del volante?
3. 3) Nel caso in cui non siano visibili problemi hardware, provare ad avviare la base in modalità bootloader. Tieni premuto il pulsante di accensione per 10 secondi mentre la base è collegata a un PC Windows con il nostro driver installato. L'aggiornamento del firmware verrà visualizzato sullo schermo. Procedi con l'aggiornamento e prova a riaccendere la base.
Nel caso in cui il LED dell'alimentatore sia spento mentre l'alimentatore è collegato, verificare quanto segue:
1. 1) Ispezionare l'alimentatore ei cavi per eventuali danni. (Assicurarsi che l'alimentatore NON sia collegato alla rete elettrica!)
2. 2) Se non ci sono danni visibili, provare a collegare l'alimentatore a un'altra presa a muro.
Se il LED dell'alimentatore non si accende o la risoluzione dei problemi di cui sopra non aiuta, contattare il nostro supporto tecnico per ulteriore assistenza.
Wenn sich die Wheel Base nicht einschalten lässt, überprüfen Sie bitte Folgendes:
- Klickt der Einschaltknopf richtig?
- Können Sie eine sichtbare Beschädigung des Stromanschlusses an der Wheel Base ausschließen?
Wenn Sie beide Fragen mit Ja beantwortet haben, folgen Sie bitte den nachstehenden Anweisungen zur Fehlerbehebung.
Wenn Sie eine dieser Fragen mit Nein beantwortet haben, eröffnen Sie bitte ein Support-Ticket über das betroffene Produkt in Ihrem Fanatec-Konto.
Anweisungen zur Fehlerbehebung:
Szenario 1
- Entfernen Sie das Lenkrad von Ihrer Wheel Base.
- Wenn keine Hardware-Probleme sichtbar sind, halten Sie die Einschalttaste 10 Sekunden lang gedrückt, während die Wheel Base mit einem Windows-PC (Bootloader-Modus) verbunden ist, auf dem der neueste Fanatec-Treiber installiert ist.
- Daraufhin erscheint ein Pop-up-Fenster mit der Aufforderung, ein Firmware-Update durchzuführen. Fahren Sie mit dem Update fort und schalten Sie die Wheel Base aus und wieder ein.
Szenario 2
- Wenn Sie eine Podium DD Wheel Base mit installiertem Kill Switch verwenden, überprüfen Sie bitte, ob der Kill Switch-Knopf entriegelt ist.
- Wenn Sie die Wheel Base mit dem Kill Switch ausschalten, bleibt die Taste gedrückt, bis sie manuell entriegelt wird. Dies kann durch Drehen des Schalters im Uhrzeigersinn geschehen, wie durch die Pfeile auf dem Schalter angezeigt. Wenn Sie ihn nicht entriegeln, kann es zu Problemen beim Einschalten Ihrer Wheel Base kommen.
Szenario 3
Wenn die PSU-LED nicht leuchtet, während das Netzteil angeschlossen ist, überprüfen Sie bitte die folgenden Punkte:
- Überprüfen Sie das Netzteil und die Kabel auf Beschädigungen (stellen Sie sicher, dass das Netzteil NICHT in eine Steckdose eingesteckt/angeschlossen ist).
- Wenn keine sichtbaren Schäden vorhanden sind, versuchen Sie bitte, das Netzteil an eine andere Steckdose anzuschließen (vermeiden Sie bitte Verlängerungskabel oder Steckdosenleisten).
Wenn keine dieser Anweisungen zur Fehlerbehebung Ihr Problem gelöst hat, wenden Sie sich bitte an unseren technischen Support, um weitere Unterstützung zu erhalten.
Such unpleasant effect is often caused by not properly set tuning menu settings.
We do expect that players will want to get the most out of their wheel bases, but maxing out all available settings is not the right way to do it. Often this ends up in the car becoming undriveable or the force feedback feeling is not so pleasant.
To get a good starting point and settings that will make sure that the base will provide you with proper behaviour, you can check the Fanatec Recommended settings for the game you wish to play. You will find a list of games in our Forum (https://forum.fanatec.com/categories/Fanatec_Forum) under the Racing Games/Simulations. Select your game and you will see the Fanatec Recommended settings page showing on top. Please note that the settings are different for each platform so please take a moment to select the right platform (mentioned in the title).
Apply the Fanatec recommended settings, test and see if they suit you. You can then start fine-tuning and get the desired force feedback feeling that will match your driving style perfectly.
Un tel effet désagréable est souvent causé par des paramètres de menu de réglage mal réglés.
Nous nous attendons à ce que les joueurs veuillent tirer le meilleur parti de leurs roues, mais maximiser tous les paramètres disponibles n'est pas la bonne façon de le faire. Souvent, cela finit par rendre la voiture incontrôlable ou la sensation de retour de force n'est pas si agréable.
Pour obtenir un bon point de départ et des paramètres qui garantiront que la base vous fournira un comportement approprié, vous pouvez vérifier les paramètres recommandés par Fanatec pour le jeu auquel vous souhaitez jouer. Vous trouverez une liste de jeux dans notre Forum (https://forum.fanatec.com/categories/Fanatec_Forum) sous Racing Games/Simulations. Sélectionnez votre jeu et vous verrez la page des paramètres recommandés par Fanatec s'afficher en haut. Veuillez noter que les paramètres sont différents pour chaque plate-forme, veuillez donc prendre un moment pour sélectionner la bonne plate-forme (mentionnée dans le titre).
Appliquez les paramètres recommandés par Fanatec, testez et voyez s'ils vous conviennent. Vous pouvez ensuite commencer à régler avec précision et obtenir la sensation de retour de force souhaitée qui correspondra parfaitement à votre style de conduite.
Tal efecto desagradable es a menudo causado por no ajustar correctamente la configuración del menú.
Esperamos que los jugadores quieran sacar el máximo provecho de sus bases de ruedas, pero maximizar todos los ajustes disponibles no es la forma correcta de hacerlo. A menudo esto termina ocasionando que el coche que se vuela inconducible o que la sensación de retroalimentación de la fuerza (FFB) no sea tan agradable.
Para tener un buen punto de partida y ajustes que asegurarán que la base le proporcionará un comportamiento adecuado, puede consultar los ajustes recomendados de Fanatec para el juego que desee jugar. Encontrará una lista de juegos en nuestro Foro (https://forum.fanatec.com/categories/Fanatec_Forum) en la sección Juegos de carreras / Simulaciones (Racing Games/ Simulations) . Seleccione su juego y verá la página de configuración recomendada de Fanatec que se muestra en la parte superior. Por favor tenga en cuenta que las configuraciones son para plataforma, por lo que es recomendable tomarse un momento para seleccionar la plataforma correcta (mencionada en el título).
Aplique los ajustes recomendados de Fanatec, pruebe y compruebe si le convienen. Entonces, puede comenzar a afinar y obtener la sensación de retroalimentación de fuerza (FFB) deseada que coincida perfectamente con su estilo de conducción.
Tale effetto spiacevole è spesso causato da impostazioni del menu di sintonizzazione non impostate correttamente.
Ci aspettiamo che i giocatori vogliano ottenere il massimo dalle loro basi del volante, ma massimizzare tutte le impostazioni disponibili non è il modo giusto per farlo. Spesso questo finisce nel rendere l’auto inguidabile o causando la sensazione di force feedback non piacevole.
Per ottenere un buon punto di partenza e impostazioni che assicurino che la base ti fornisca un comportamento corretto, puoi controllare le impostazioni consigliate da Fanatec per il gioco a cui desideri giocare. Troverai un elenco di giochi nel nostro Forum (https://forum.fanatec.com/categories/Fanatec_Forum) sotto Giochi di corse/Simulazione. Seleziona il tuo gioco e vedrai la pagina delle impostazioni consigliate di Fanatec mostrata in alto. Tieni presente che le impostazioni sono diverse per ogni piattaforma, quindi prenditi un momento per selezionare la piattaforma giusta (menzionata nel titolo).
Applica le impostazioni consigliate da Fanatec, prova e vedi se ti si addicono. Puoi quindi iniziare la messa a punto e ottenere la sensazione di force feedback desiderata che si abbinerà perfettamente al tuo stile di guida.
Solch ein unerwünschter Effekt kann oft bei falschen Einstellungen im Tuning Menu entstehen.
Natürlich erwarten wir, dass Nutzer das Meiste aus Ihren Wheel Bases herausholen möchten, alle verfügbaren Einstellungen auf Maximum zu stellen ist allerdings nicht der richtige Weg. Oft führt dies dazu, dass das Fahrzeug nicht mehr fahrbar ist oder das Force Feedback Gefühl nicht so angenehm ist.
Ein guter Anhaltspunkt für die Einstellungen sind die Fanatec Recommended Settings um sicherzustellen, dass sich Ihre Wheel Base ordnungsgemäß und vernünftig verhält. Sie finden dazu eine Liste mit Spielen/Simulationen in unserem Forum (https://forum.fanatec.com/categories/Fanatec_Forum) unter Racing Games/Simulations.
Wählen Sie Ihr Spiel aus und Sie werden die Fanatec Recommended Settings Seite oben auftauchen sehen. Bitte beachten Sie, dass die Einstellungen für jede Plattform variieren, stellen Sie also bitte sicher, dass Sie auch die richtige Plattform gewählt haben (Plattform ist im Titel erwähnt).
Wenden Sie die Fanatec Recommended Settings an und testen Sie, ob Ihnen diese zusagen. Anschließend können Sie das Feintuning angehen um das gewünschte Force Feedback zu erhalten, welches perfekt zu Ihrem Fahrstil passt.
In case the Power LED starts pulsating as soon as you attach the steering wheel, please check the following:
1) We have to make sure that we have the latest driver package installed and that our firmware is up to date. Please know that our latest steering wheels require the latest driver package and firmware for your base in order to be recognized. To download the driver, please go to the following page: https://fanatec.com/eu-de/driver
Once downloaded, please install it and proceed with the firmware updates
2) Inspect the pins at the back of the steering wheel as well as the hub of the wheelbase for any damage. (You will probably notice that one of the pins is shorter than the others. This is nothing to worry about. The shorten pin is left like this on purpose). In case you spot any damage, please make sure to reach out to our technical support team.
3) Loosen and then moderately retighten the screws located at the back of the steering wheel, around the pins and also the one in the middle.
In case none of the steps above help and you still get the pulsating power LED, please reach out to our technical support team. They will be able to assist you further.
Si la LED d'alimentation commence à clignoter dès que vous attachez le volant, veuillez vérifier le suivant :
1) Nous devons nous assurer que nous avons le dernier pack de pilotes installé et que notre firmware est à jour
Sachez que nos derniers volants nécessitent le dernier pack de pilotes et le dernier firmware pour votre base afin d’être reconnu. Pour télécharger le pilote, veuillez-vous rendre sur la page suivante :
https://fanatec.com/eu-de/driver
Une fois téléchargé, veuillez l'installer et procéder aux mises à jour du firmware
2) Inspectez les pins à l'arrière du volant ainsi que le moyeu de la base pour tout dégât. (Vous remarquerez probablement que l'un des pins est plus court que les autres. Il n'y a pas de quoi s'inquiéter. Le pin raccourci est laissé comme ça exprès). Si vous constatez des dégâts, assurez-vous de contacter notre équipe d'assistance technique.
3) Desserrer puis resserrer modérément les vis situées à l'arrière du volant, autour des pins et aussi celle du milieu.
Si aucune des étapes ci-dessus ne vous aide et que vous obtenez toujours le voyant d'alimentation clignotant, veuillez contacter notre équipe d'assistance technique. Ils pourront vous aider davantage.
En caso de que la luz LED de encendido en la base comience apenas conecte el volante, por favor verifique lo siguiente:
1) Tenemos que asegurarnos de que tenemos el paquete de controladores (driver) actual instalado, y que nuestro firmware está actualizado. Tenga en cuenta que nuestros volantes más recientes requieren el último paquete de controladores y firmware para su base para poder ser reconocidos. Para descargar el controlador, vaya a la siguiente página: https://fanatec.com/eu-de/driver
Una vez descargado, instálelo y continúe con las actualizaciones de firmware sugeridas.
2) Inspeccione los pines conectores en la parte posterior del volante, así como el conector de su base para verificar que no haya algún daño. (Probablemente notará que uno de los pines es más corto que los otros. Esto no es nada de lo que preocuparse. El perno acortado es más corto a propósito). En caso de que detecte algún daño, asegúrese de comunicarse con nuestro equipo de soporte técnico.
3) Afloje y luego moderadamente reapriete los tornillos ubicados en la parte posterior del volante, alrededor de los pines y también el del centro.
En caso de que ninguno de los pasos anteriores ayude y la luz LED de encendido aún esté parpadeando, comuníquese con nuestro equipo de soporte técnico. Ellos serán capaces de ayudarle aún más.
Nel caso in cui il LED di alimentazione inizi a lampeggiare non appena si collega il volante, controllare quanto segue:
1) Assicurarsi di avere installato il pacchetto driver più recente e che il nostro firmware sia aggiornato. Tieni presente che i nostri ultimi volanti richiedono il pacchetto driver e il firmware più recenti per la tua base, per essere riconosciuti. Per scaricare il driver, vai alla seguente pagina: https://fanatec.com/eu-de/driver Una volta scaricato, installalo e procedi con gli aggiornamenti del firmware
2) Ispezionare i perni sul retro del volante e il mozzo del base per eventuali danni. (Probabilmente noterai che uno dei perni è più corto degli altri. Non c'è nulla di cui preoccuparsi. Il perno accorciato è lasciato apposta così). In caso di danni, assicurati di contattare il gruppo di Supporto Tecnico.
3) Allentare e poi riavvitare moderatamente le viti poste sul retro del volante, attorno ai perni e anche quella centrale.
Nel caso in cui nessuno dei passaggi precedenti sia d'aiuto e continui a visualizzare il LED di alimentazione pulsante, contatta il gruppo di Supporto Tecnico. Saranno in grado di aiutarti ulteriormente.
Sollte die Power LED pulsierend aufleuchten, wenn Sie ihr Lenkrad anschließen, prüfen Sie bitte folgendes:
1) Wir müssen sicherstellen, dass Sie das aktuellste Treiberpaket installiert haben und die Firmware auf allen Produkten aktualisiert haben. Bitte beachten Sie, dass unsere neuesten Lenkräder immer die aktuellste Firmware auf der Base installiert benötigen, da die Lenkräder sonst nicht erkannt werden können. Um den Treiber herunterzuladen, folgen Sie diesem Link:
https://fanatec.com/eu-de/driver
Sobald Sie die Datei heruntergeladen haben, installieren Sie diese und fahren mit den Firmware-Updates fort.
2) Prüfen Sie die Pins im Quick Release Connector des Lenkrads auf Beschädigungen. (Sie werden vermutlich bemerken, dass einer der Pins kürzer ist als die anderen. Dies ist vollkommen normal und der Pin ist absichtlich kürzer). Sollten Sie eine Beschädigung an den Pins erkennen können, kontaktieren Sie bitte unseren Technischen Support.
3) Lockern und ziehen Sie die Schrauben rund um die Pins im Connector (und die kleine Schraube mittig der Pins) anschließend wieder mäßig an.
Sollten die oben genannten Schritte keine Besserung bringen und Sie immer noch die pulsierende Power LED an der Base sehen, kontaktieren Sie bitte unseren Technischen Support.